It’s been almost two weeks, so it’s about time I post these before I forget all the details.
This installation happened on October 3rd, I’ll intersperse images and commentary here. Enjoy!
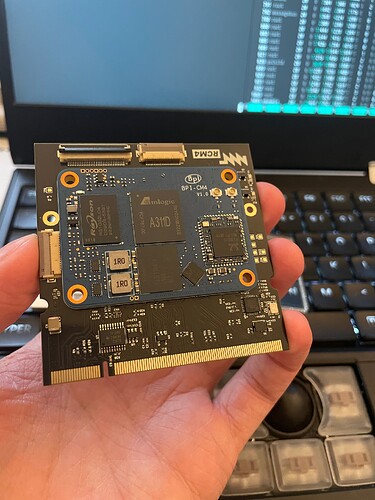
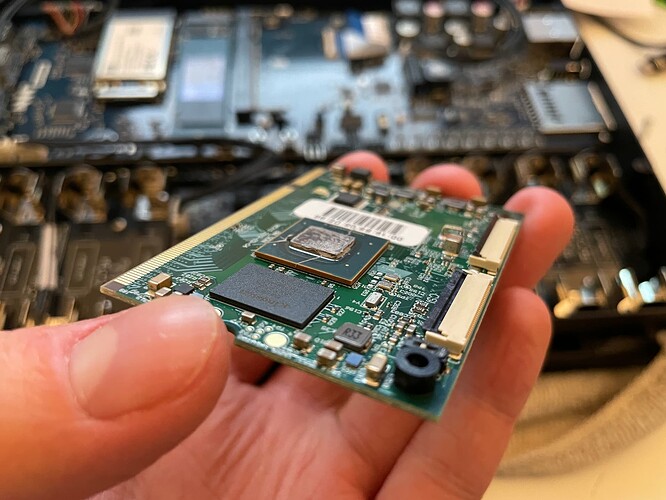
The SoM itself. I kind of forgot just how cool the BPi is in the time since I ordered it. It adds Bluetooth 5.0 to the Reform, so I can now connect bluetooth headphones too, cool! More on the CPU performance at the end.
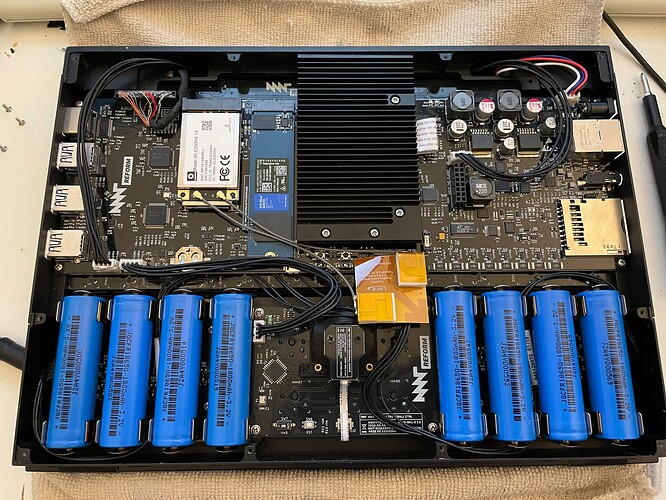
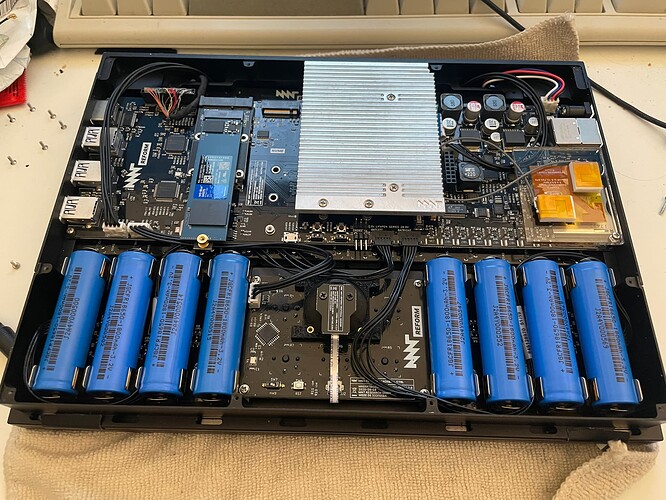
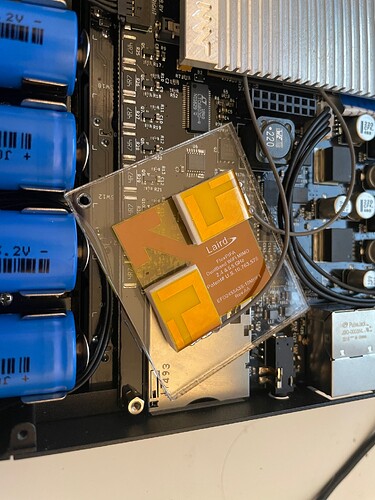
Here’s my Reform config before the upgrade. Pretty stock, still. I have 1800mAh cells in here. The upgrades I’ve already done are: Steel port covers, protected battery boards, Laird WiFi antenna, and the homing F+J keycaps.
Beyond that, all my custom modifications thus far are in software, I’ve tweaked firmware in some places, and I’ll upstream those changes soon.
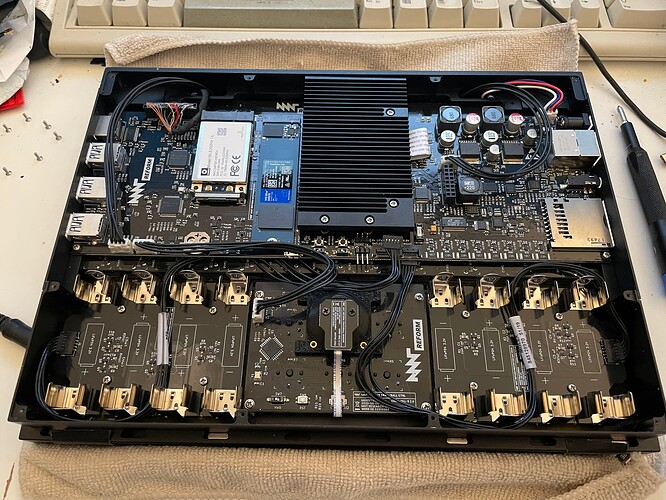
First up, I disconnected the battery boards, and also removed the cells to be extra safe.
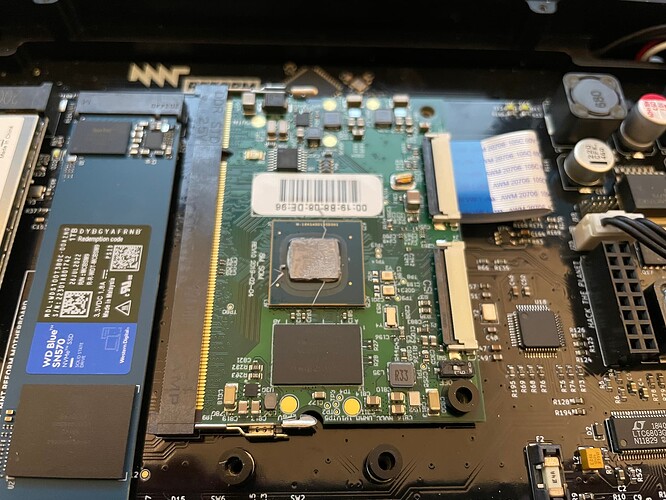
Heat sink comes off next, then the MIPI DSI connector on the right there, and then the i.mx8 module can come off.
This thing served me well. I’m really happy that I can comfortably fit my computing life in 4GB of RAM.
When I first encountered the Reform through seeing Technomancy’s excellent post on Hacker News, I was living a very different kind of digital life. I had been an avid Apple fan and Mac user for over 12 years, though already growing more and more frustrated with the direction macOS was headed in. I already knew I was going to have to jump to Linux at some point. I feel like the Reform really accelerated that process. Even before I received my unit last summer, I got acquainted with tiling window managers on my desktop (ex-Hackintosh, now running Arch), and I was instantly hooked. I still use a MacBook Pro for work, and these days I actually find macOS really clunky and awkward to use!
Test fitting the A311D. It extends further out from the socket than the i.mx8, so the MIPI DSI cable on the right there will require some careful manipulation to get it seated correctly. I found it easier to unlatch and lift the SoM a bit to get the connector in.
The standoffs on the heat sink are now installed on the SoM and motherboard, and I decided to focus on the WiFi antenna before messing with the MIPI DSI cable. The instructions do actually say to connect it in the first step, and I recommend the same. I guess I just skipped over that part when reading.
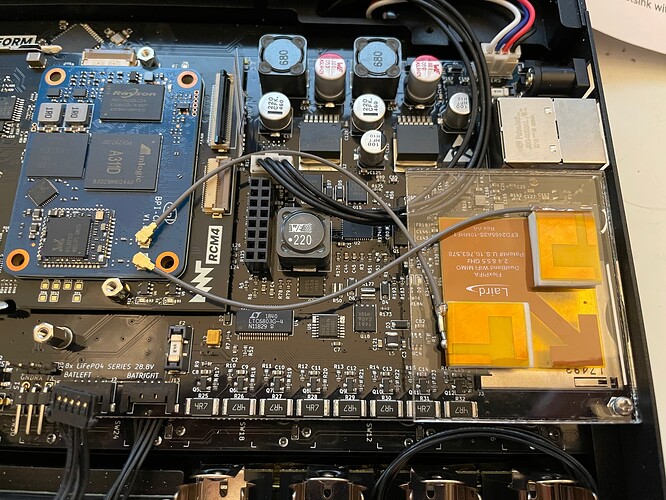
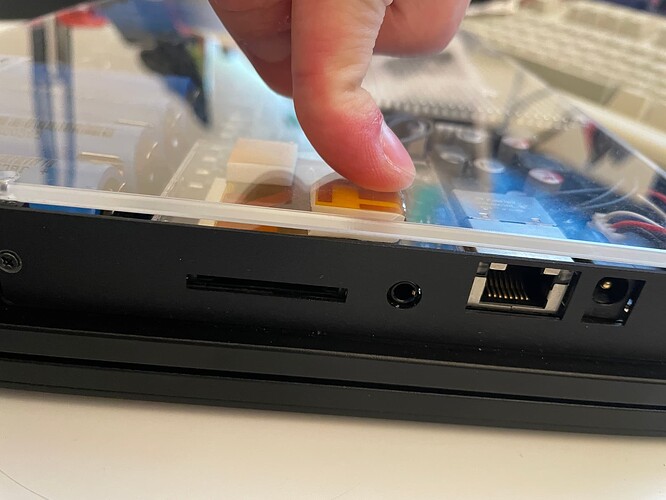
This picture shows how I decided to install the Laird antenna I already had. I don’t recommend this particular setup you see in that picture - I found there not to be enough clearance between the acrylic antenna holder and the acrylic back cover. You’ll see pictures of this later when I find that out, as well as my solution. I had already glued the Laird to the acrylic in this picture. Whoops!
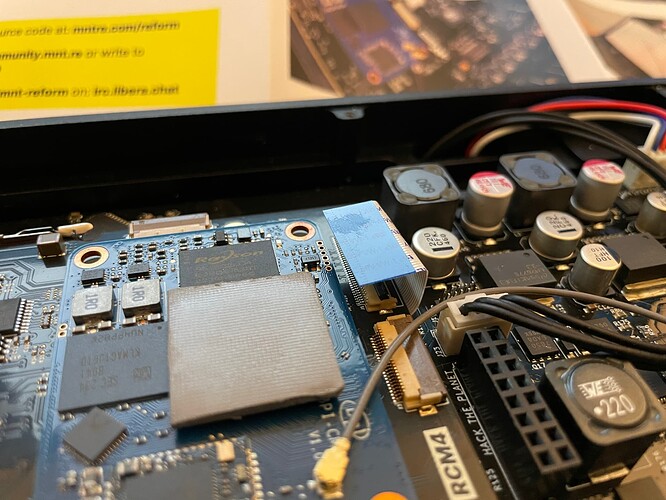
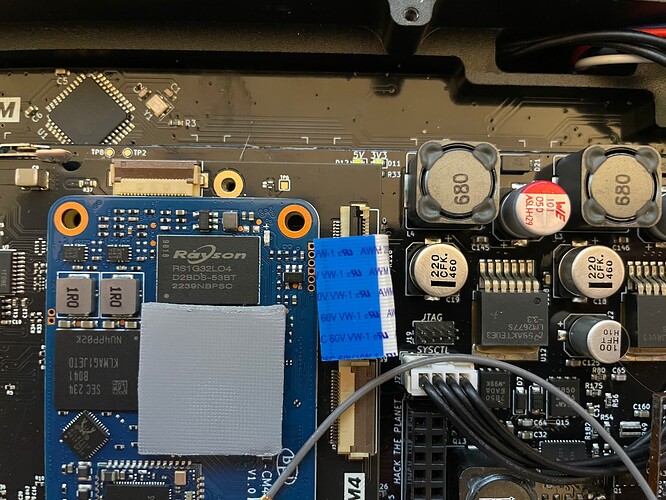
I had already put the thermal pad on when I realized that the MIPI DSI connector was still dangling freely. The next few pics illustrate what happens next.
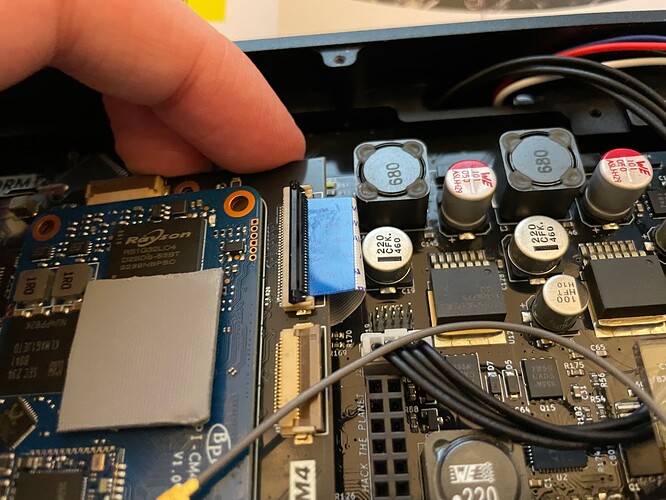
The connector on the motherboard is slightly offset from the corresponding connector on the RCM adapter board. It’s quite difficult to get it to align properly with the board seated fully in, so in the next pic you’ll see me unlatch the board to tilt it up a bit, and that made it easier to get the connector in.
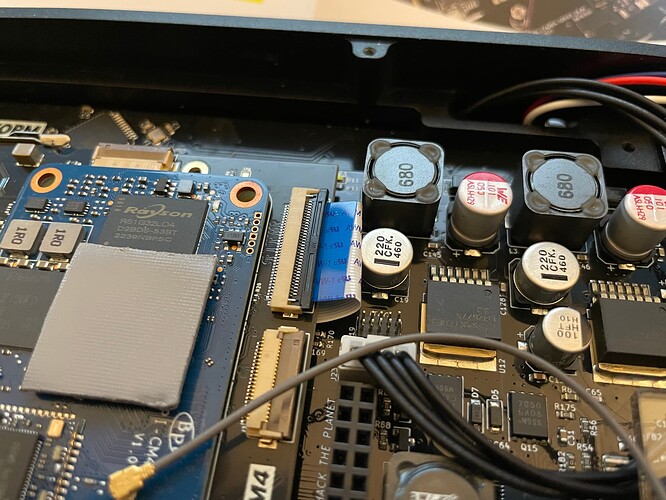
Board lifted, connector in.
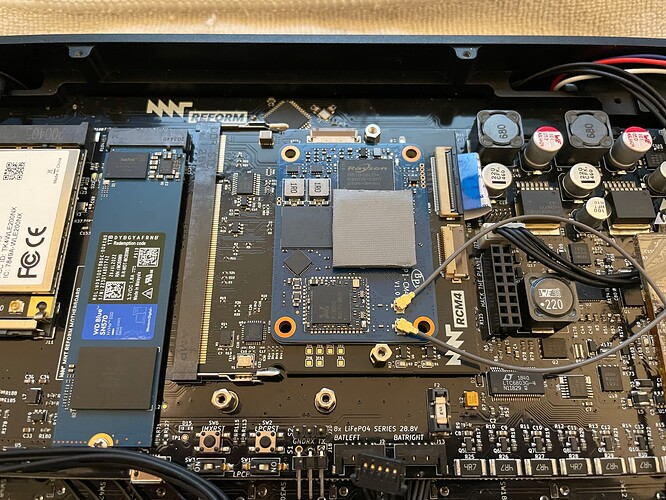
Connector latched, and the board pushed all the way down now, and latched in place. The MIPI DSI cable tries to give the C19 capacitor a hug, how cute!
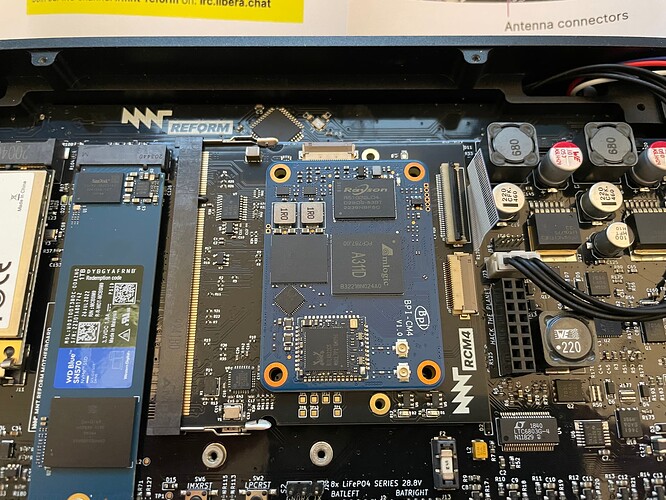
The SoM is now good to go, ready for the heat sink. But before that, I need to remove the old WiFi card, and switch my M.2 SSD into that slot. The BPi compute module has one PCI lane exposed, and that’s routed to the mPCIe slot, rendering the M.2 slot inactive. This is okay though, as the BPi module comes with a better WiFi chip anyway, so the extra WiFi card isn’t needed.
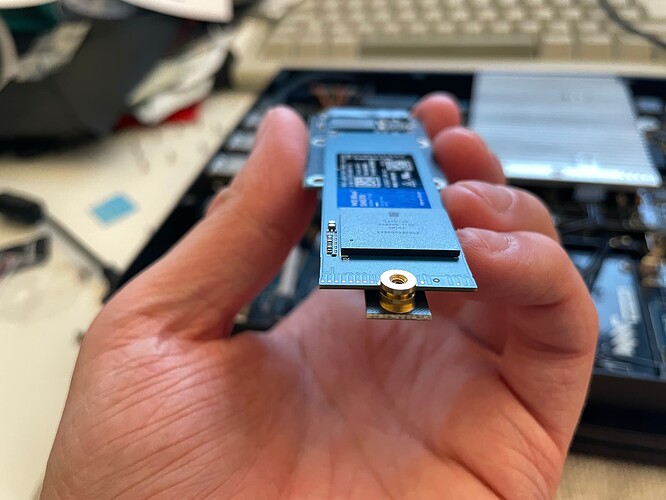
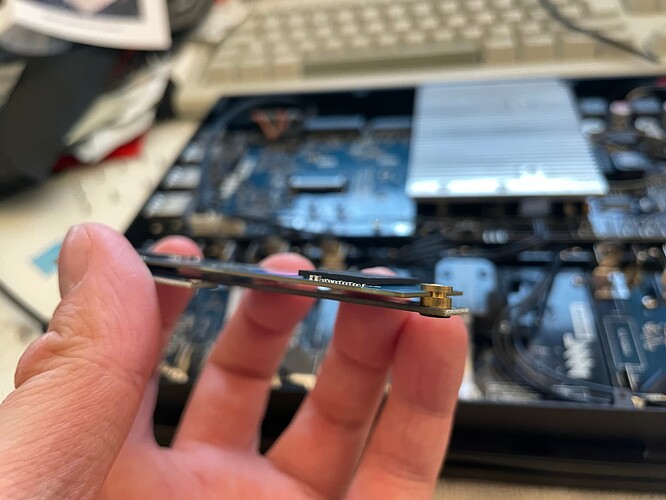
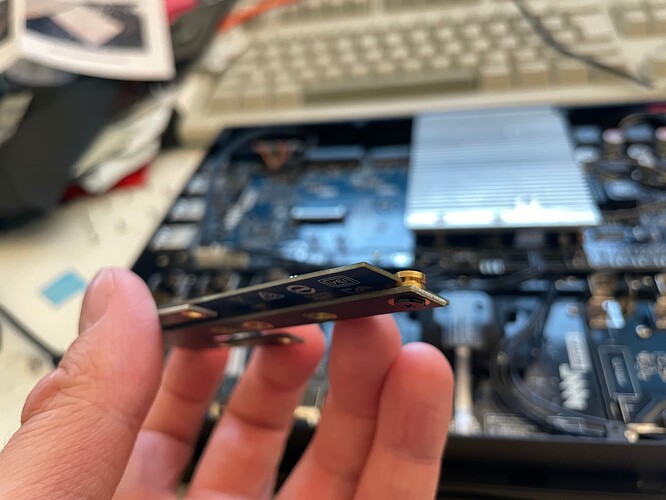
The A311D kit comes with an adapter for the M.2 SSD. Pay close attention to the following images, I show detailed pictures of how the standoff that holds the end of the M.2 works.
So the black screw comes off, and releases the brass cylinder. That then slots very snugly onto the semicircular cutout on the M.2, and the whole assembly then screws back down with the black screw.
M.2 is installed in its new home, the heat sink is installed, and the cells are back in their slots. I’ve also connected the battery boards.
Oof! The Laird antenna is just a bit too thick to fit between the two acrylic plates. I could screw down the back cover, but it would be in tension, and there would be a gap here.
I fiddled with it a bit, and the acrylic found this spot here. It’s actually pretty snug in there with the back cover attached, and doesn’t rattle at all, unlike the old stock antenna holder that was held by the internal USB connectors. This works well for now, I’ll come up with a more permanent solution later if I feel the need for it.
And that’s it! Hardware portion is done. I opted to continue with my existing installation on the M.2 - My / on LUKS encrypted lvm. To migrate that installation to the new SoM, the steps are roughly:
- Make sure to install latest updates before doing the hardware upgrade - During the process, @josch made a bunch of improvements to the system image, so your upgrade should go smoother than mine.
- I wrote a fresh SysV4 image to an SD card, and booted from it
- I luksOpened my encrypted volume, mounted it in /mnt, mounted /boot from the SD card to /mnt/boot, mounted /proc and /sys, chrooted to the volume, and then ran
update-initramfs -uandflash-kernel
Booting from EMMC is currently not well tested, and is not recommended. Flashing a misconfigured u-boot to EMMC may soft-brick your BPi.
I’m extremely happy with this upgrade! The speed boost is very noticeable in normal use. Compiling with 6 cores is way faster than on the i.mx8 - @josch found that compiling the kernel in the reform system image took 347 minutes on the i.mx8mq. I ran that same compile on my A311D, and it only took 162 minutes. That’s about twice as fast! Not only are 4 of the 6 cores on the A311D the faster, speculating A72 variant, there’s also two extra A53s in there to handle background tasks, so the faster cores are available more.
