Trackball switch repair report

So a couple weeks ago I’ve had an unfortunate situation happen - the left trackball button has snapped off the switch.

As the CAD files for the keycaps are available, printing a new one wasn’t an issue. What was worse, was that the little plastic stem broke off and got stuck inside the switch.


I’ve tried doing the trick with the heated-up needle to melt the plastic a bit. That cleared out one side of the switch, but the other one was properly stuck and nothing could get it out.

In a more mainstream laptop, I guess there would be nothing else to do than replace the whole trackball module (or glue the keycap in or something)… But not with Reform!

A quick look at the BOM (available for example here) reveals the part is a Kailh CPG135001D02. Luck has it, those are very readily available from online shops.

Once the switches have arrived, there was nothing else to do than desolder the old switch, and put in a new one.

I didn’t take photos of the soldering process, but it was quite easy - there’s 2 pins to be removed and that’s it. I don’t have a nice desoldering iron and had to make due with a simple pump, but 5 minutes later the replacement switch was installed and good to go.

4 Likes


The replacement keycap I’ve 3d-printed looks so great I honestly can’t tell the difference - but what matters is it works!

4 Likes

Awesome, really good DIY job!

My little son also played a bit with trackball and snapped off the button entirely, both legs.
I have FDM and SLA printer and I suspect (I didn’t try yet) SLA should be a bit more solid?
Also are there any remixes of the 3d model to improve it, like to add some rim around the keytop to hold a button a bit more strongly by distributing side forces out of the brittle shafts?

SLA FDM tends to be better for strength.

No remixes of the buttons yet AFAIK. Sounds like a solid idea for improvement, though.

Thanks for the feedback.
I have measured the shaft and movement - it seems the shaft lays flat normally when pressed, which does not allow for any rim. However the movement is 2.5mm and the switch triggers roughly at 1.5mm, so making a rim let say 0.8mm should provide some support while still allowing for reliable trigger. At the cost of reduced tactile feedback.
I’m going to experiment with FDM prints first perhaps, PLA smells better during the test prints.
P.S. the stem remnants came out easily with simple pin (which is the same as needle, 0.6mm), no need to heat it and melt it in. But maybe it’s because it snapped at the very top so i could insert the needle point into one of the side spacers.

Sorry, I got mixed up: I believe FDM is generally better for strength. The plastic tends to be tougher than what resin-based printing yields, from what I’ve heard (how much so will of course depend on what thermoplastic you’re using, of course; e.g., polycarbonate with embedded carbon fiber is quite a bit stronger than PLA). I only have an FDM printer, so I can’t confirm.

Of course there’s tough resin and then there’s ABS. But my concern is not about material but adhesion. Every now and then my FDM prints crackle interlayer on strain. Which is the reason for inconvenient button orientation - vertical versus horizontal, to have holding stems being part of the same layer top to bottom, rather than sandwich. But SLA to me gives better interlayer polymerisation. But again, I wasn’t testing so treat it as speculation :slight_smile:

1 Like

Yeah, I’d definitely be interested in hearing your findings. I’ve played with 3D printing Kail Choc keycaps a bit and they seemed pretty strong, even printed with the layers perpendicular to the stems, but I haven’t really torture-tested them or used them over any significant period of time.

Actually I think you are right, I’ve made a draft print of the draft model and it sits well. Not as solid as others but still ok. I was pulling it in and out while trying to remove residuals and make the rim sit around the shaft (in the end was forced to remove it as wasn’t snapping in) and the stems are still ok. But FDM precision is not sufficient for a support rim that’s what I learned. Will try the same model with SLA, maybe will work better.

1 Like

About an hour ago I dropped a battery on the two rightmost trackball buttons, snapping off both their legs in the switch. One leg in each switch snapped right at the top, so I was able to lift those out with a bit of tape. The other two were in pretty deep, and I was hesitant to put a heated needle into my switches for fear I’d warp the stems somehow and render them unusable.

PSA: I took the bottom off the Reform, removed the batteries, and took out the whole trackball module after losing the little metal stabilizer from one of the switches somewhere inside the machine. Don’t be like me. Take out the batteries and the trackball module first.

To retrieve the other two legs from the stems, I grabbed my curved-tip tweezers and tried working them under the tabs on the sides of the trackpad switches, one at a time. (I found freeing the screen-side right-hand tab, followed by the user-side right-hand tab, easiest. The screen-side tabs are able to pull away from the PCB a bit more, and the right-hand tabs don’t have a trackball in the way.) I managed to open the switches this way, which allowed me to remove the stems. I took a bit of gaffer’s tape (nothing special about it; it was just what I had on hand), placed it sticky-side up on my desk, put a stem upside-down against it, and then pressed a thumbtack into its back where I imagined it would line up with the socket containing the broken leg. (There happened to be a small, faint circle from the manufacturing process in exactly the place I needed to push on both my switches.)

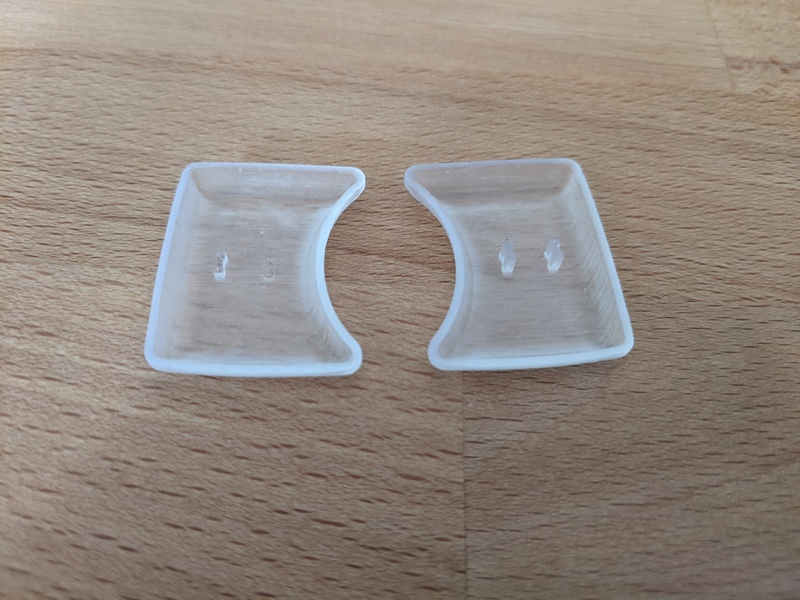
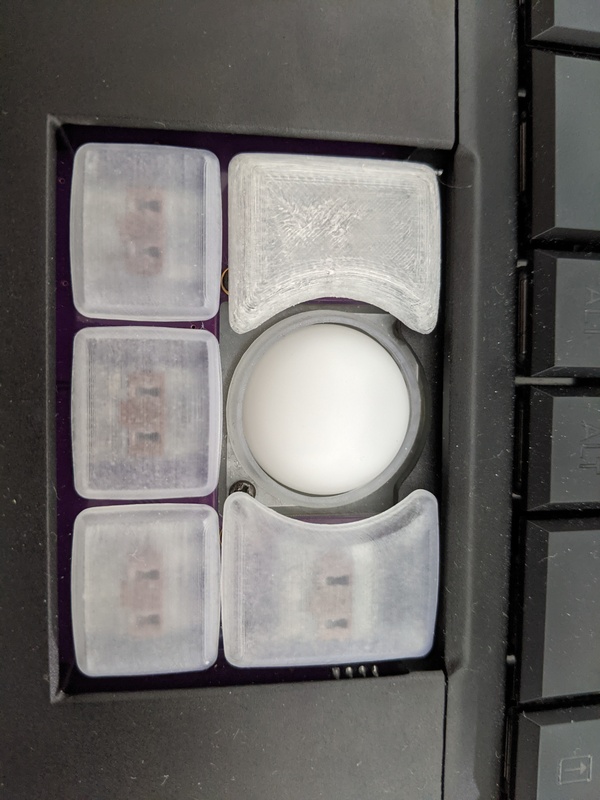
The thumbtack was able to push both leg pieces against the tape enough that I was then able to lift them out. After that I just put the switches back together. Next up: printing some new keycaps with my FDM printer! Open hardware for the win.

Edit: The legs on the keycaps from the FDM printer fit well (snugly, even), but they snapped right off when I tried removing the keycap. Left enough protruding that I was able to pull them out with tweezers, fortunately.

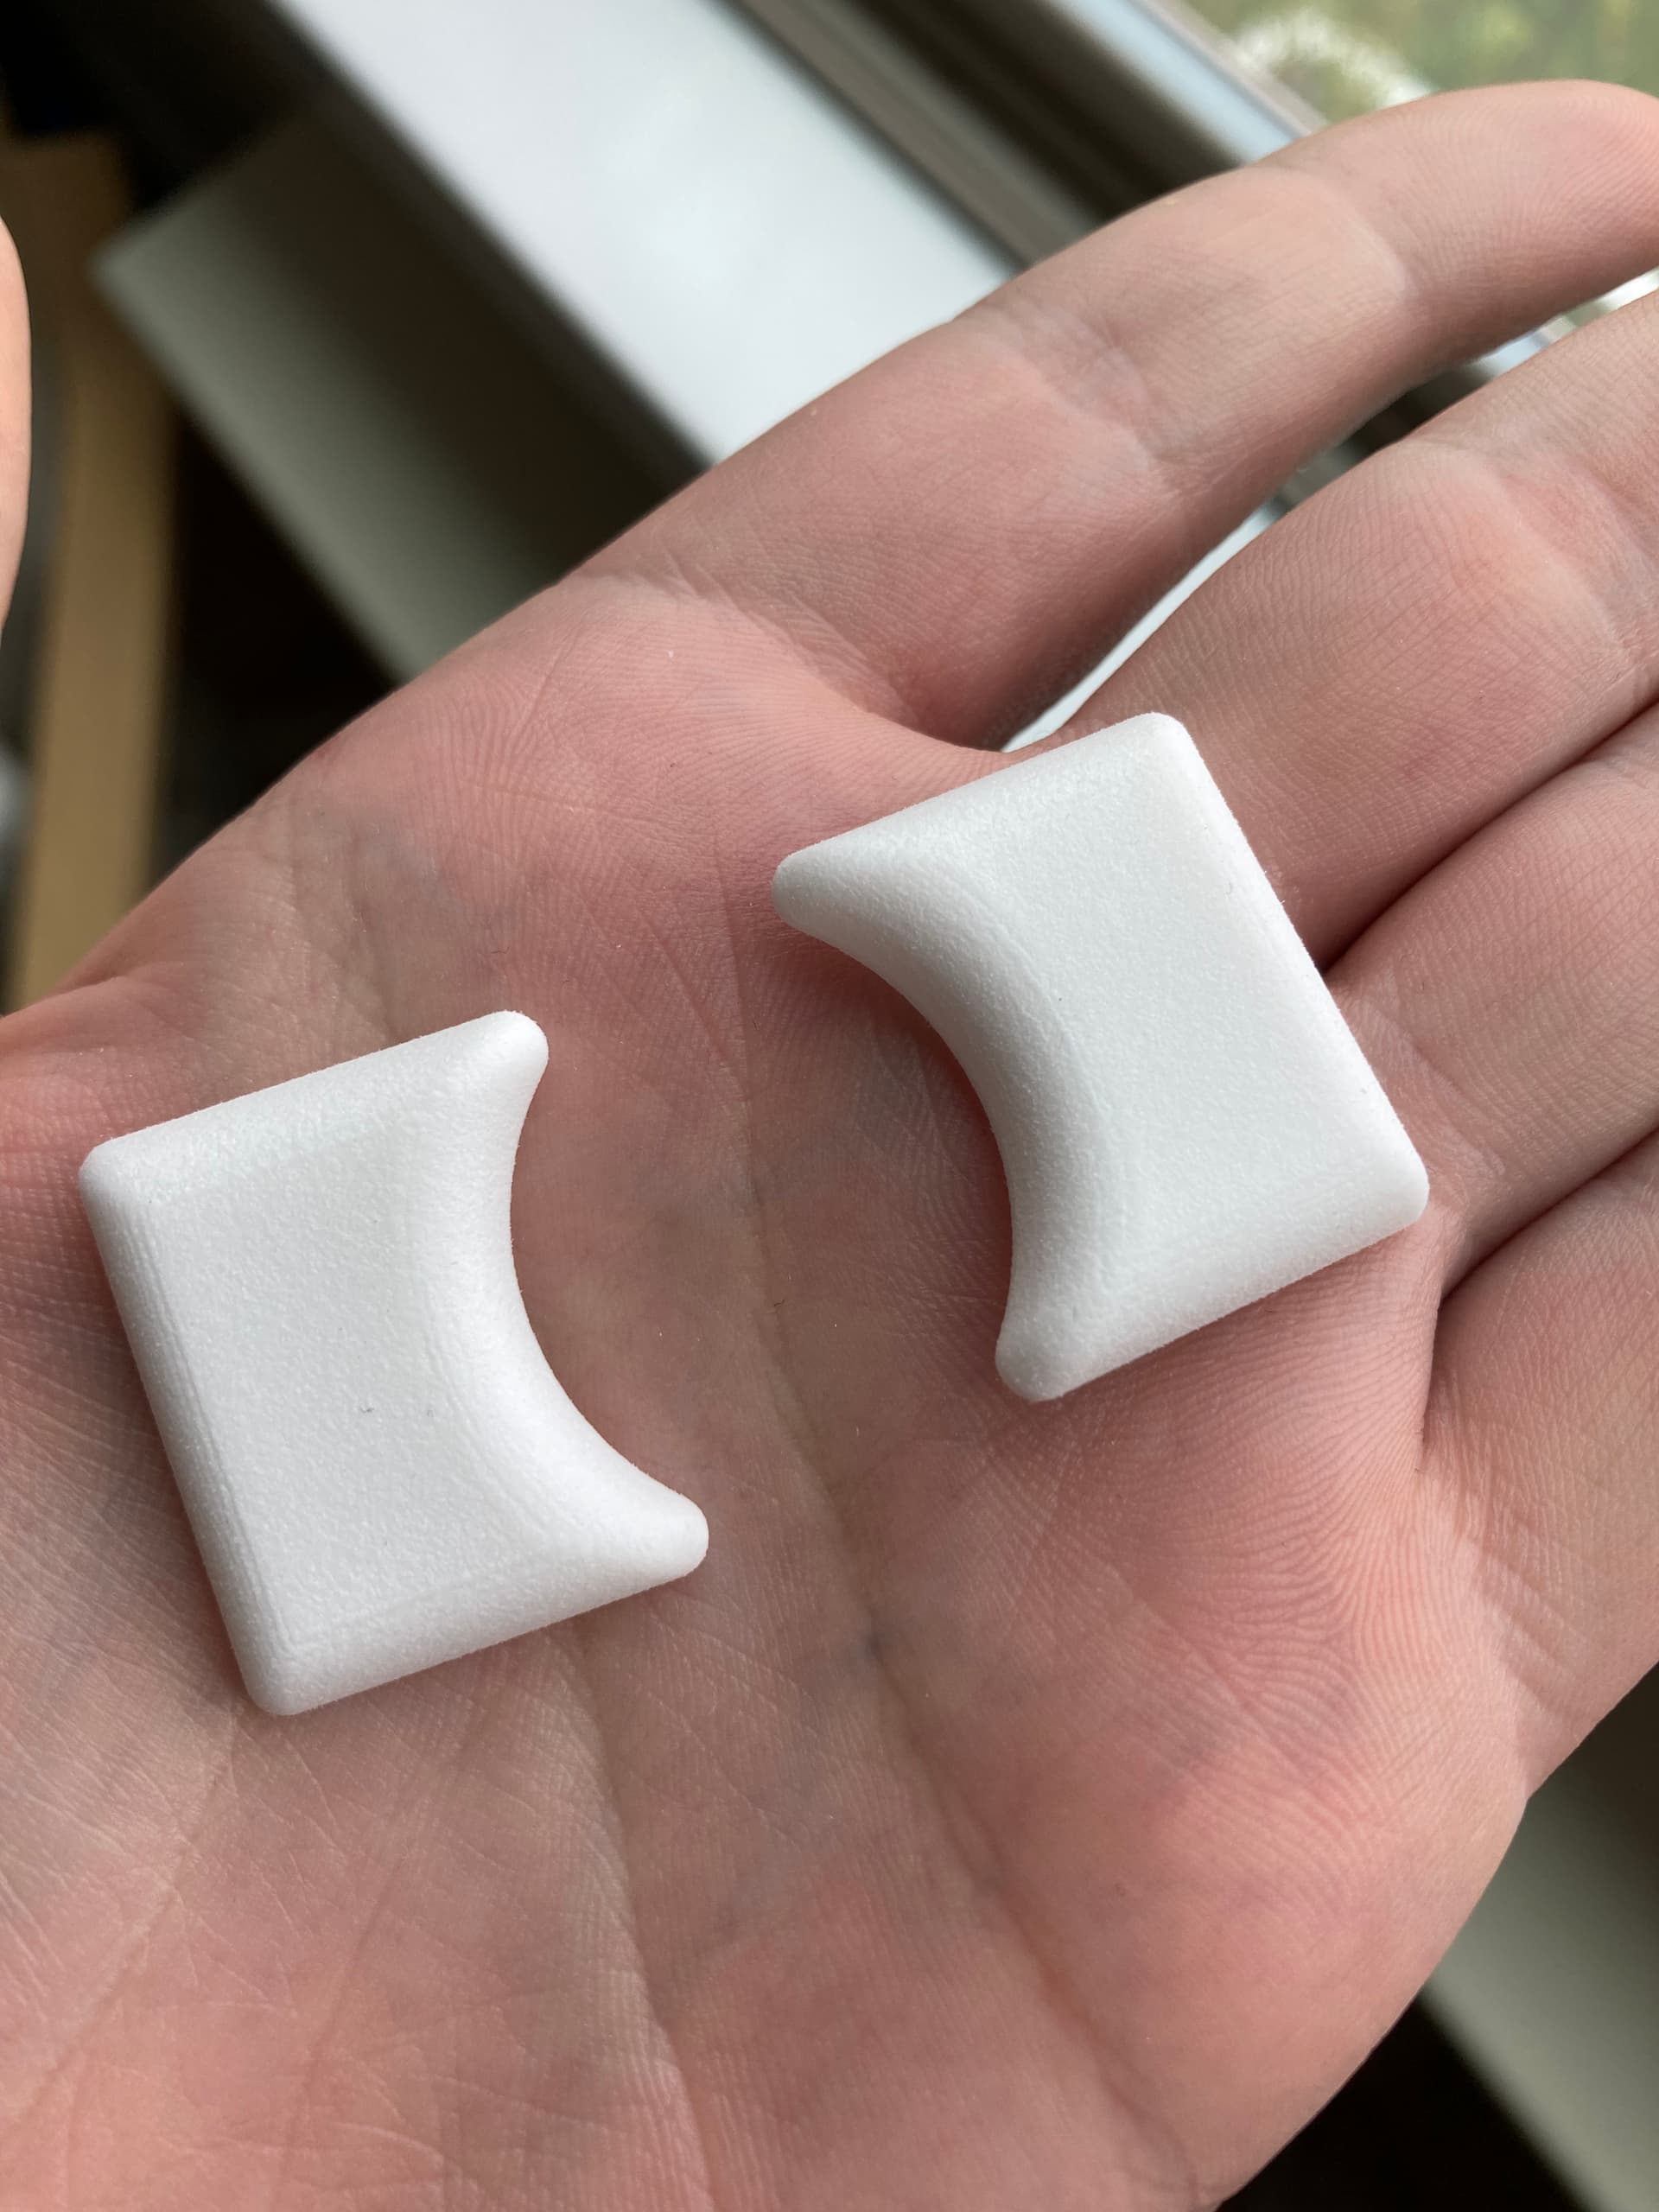
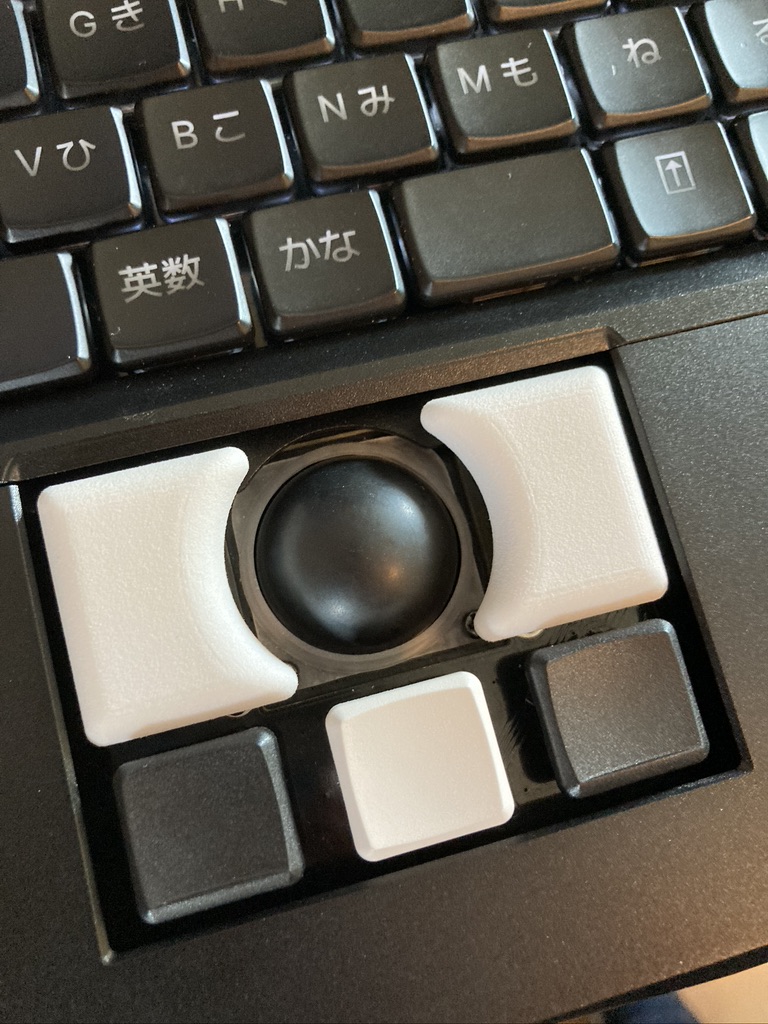
Edit 2: To avoid having to use supports, I’d printed the replacement keycap legs-up, with left the layers running perpendicular to the legs. @ruff’s concerns about interlayer adhesion were spot-on. I turned on supports and tried printing it in the model’s original orientation, and the resulting legs are much stronger. At least as strong as the originals. The look is rougher, of course, but I’m happy with 'em.

Used PLA for all of 'em.

I’m still using my PLA printed draft with minecraftish design, if you are interested may try it out here

1 Like

I’ve already got the replacement caps in service, so I’m going to stick with those until they break, but thanks for sharing! I like that it seems as though your design would end up with the cap bracing against the switch when depressed (as it would be if someone, for example, dropped a battery on it).

I don’t own a 3D printer, I know a couple people who do but I too have a broken trackball button and would like to get a new set of buttons. I can’t seem to figure out where I could order up some new ones. Is there somewhere I can buy a second set of buttons?

I do not believe such a shop exists at the moment. You’ll want to have one of your 3D printing friends print two of this for you in the object’s default orientation, with supports: https://source.mnt.re/reform/reform/-/raw/master/reform2-3d-printed-parts/trackball/reform2-trackball-button-circular-20200123.stl?inline=false

1 Like

Online drag-and-drop 3D printing services absolutely exist. Examples are: Hubs, Shapeways, Craftcloud, Xometry, Sculpteo etc.

2 Likes

Can report some success with Shapeways, using their versatile white material and the default option for post-processing. I was going to get some lower buttons made as well, but the STL has a thin area their engineers said was too weak to survive their tumbling/finishing process. I skipped getting the bottom buttons made and will instead use off-the-shelf Kailh Choc caps for those.

3 Likes

Update: the legs on the caps are a tiny bit too narrow to catch in the switches. I don’t know if this is a consequence of the printing or the finishing process removed too much material. Caveat emptor!

I used a trick I’ve used for other keycaps and put a small piece of thin tape or film (in this case a scrap of kapton tape) that the legs poke into, adding friction/reducing the gap in the switch. Worked great! The texture on these is very satisfying, and less slimy/smooth than the stock caps.

2 Likes