I’ve been working on an ergonomic, 60 key keyboard layout that will work on a desktop or in the reform laptop. I thought I’d post here where others can join in.
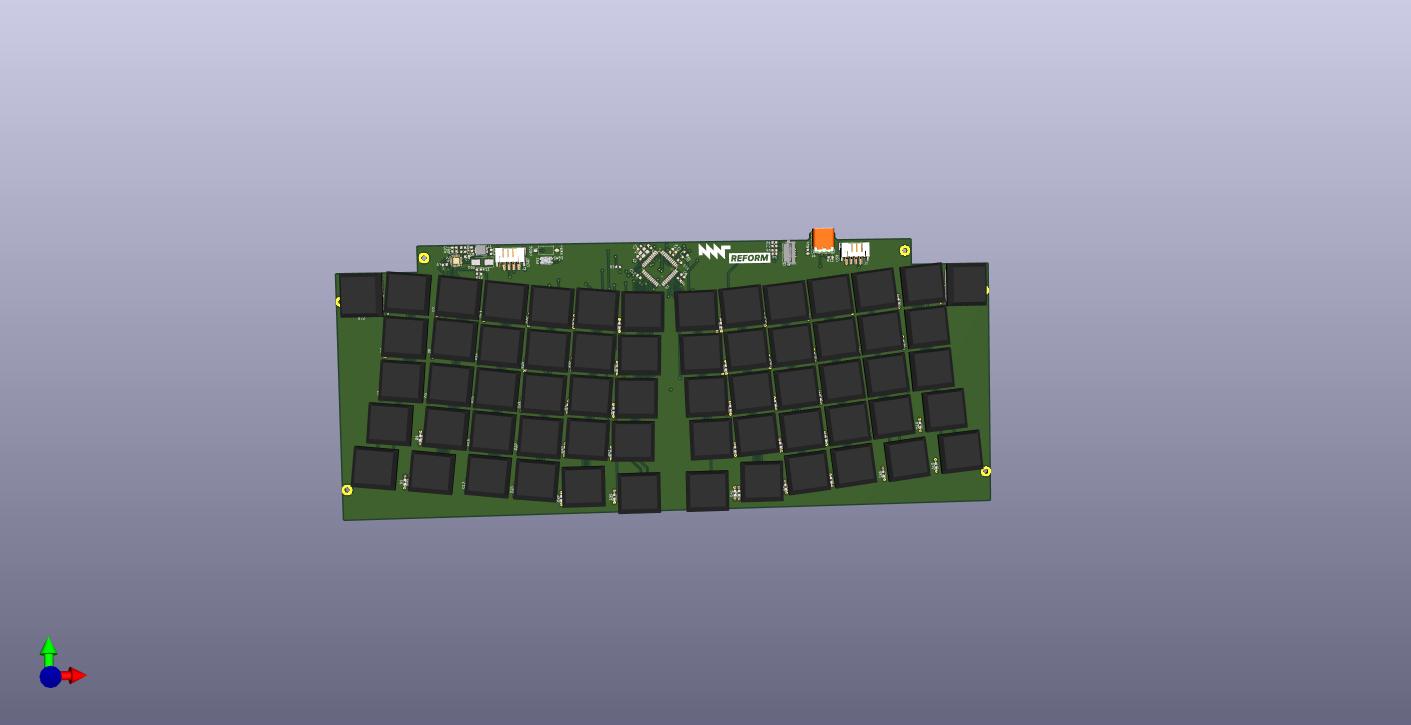
My goal is to be more ergonomic than any previous laptop keyboard (low bar), but to be “normal” enough that it would be easy for most people to adopt. So more MS natural, less butterstick. KIcad render
Desktop: Openscad & kicad are at GitHub - milestogo/lorize_kb . I’m currently testing the desktop PCB & may tighten the vertical spacing.
Reform: I used switch locations from scad to remix the reform keyboard PCB. I kept the same schematic so that stock firmware would work. See the Ergo1 branch above the KiCad link above. I haven’t yet cut a trial switchplate, debugged the PCB or had one made. I’m pretty sure some the top outside switches will rub the bezel.
I’d hoped to make a hand solder/all big parts version of the reform kb, but I wasn’t able to find room on the PCB for a STM32 blackpill or similar processor that breaks out USB. It may be possible to fit a small MCU with crenelated pads on the bottom, but the spacing will be tight. There’s probably enough room if we make a new bezel & move the OLED to a bottom corner, but I haven’t looked into that.
That leaves manual assembly of a small part surface mount board, or paying setup fees for assembly. I want to be certain I like the ergonomics before doing either, so it may be months. The source is there if others think this is interesting & want to move faster.
I had originally planned to make something like this based on my Atreus design, but I got tripped up by the requirement to drive the OLED and other things the stock Reform keyboard does beyond just being a keyboard. I was trying to take an existing PCB design and adapt it to the Reform instead of taking the Reform’s PCB and adapting it to a better layout.
What’s the next steps here? Is there anything you’d like help with? Are you planning on placing a production order for extra PCBs to sell or trying to gauge interest?
The staggered keyboard has been one of the things about the Reform that bugs me the most, so the opportunity to fix that problem is very exciting to me!
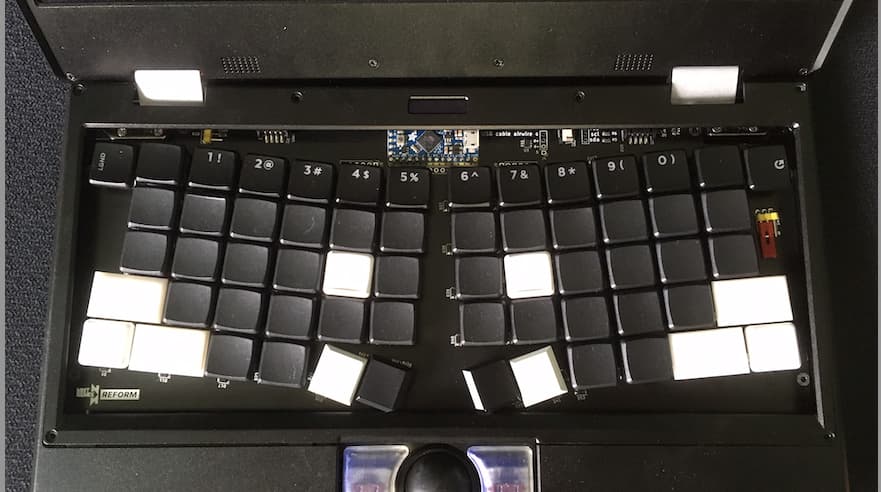
I’ve done some work on the ergonomics. I reduced the vertical switch spacing and I’m trying two tightly spaced 1U thumb keys instead of a 2U and a 1U. The 2U was fine for tapping but wasn’t comfortable to hold (I didn’t expect that). image of current design
The next step is to lay out the PCB again, and I’d welcome thoughts on how to prototype during the chip shortage. The TQFP atmega32u4 is not available this month. The VQFN is in stock, but I often fail doing VQFN by myself. It isn’t economic to do commercial assembly for a single prototype, so I’ve gone back to the idea of using an elite-C microcontroller. With the new switch spacing there is just enough room underneath the LCD. The Elite-C’s USB port won’t be accessible, so I may need to make a little molex-> USB adapter cable.
How does everybody else sync between making laser cut designs in free or openscad & pcbs in kicad?
I now have an ugly hack where I have OpenScad echo switch locations to a CSV file, and a python script for placing each part in kicad. This doesn’t feel like the right way.
I’m still teaching myself and don’t want to start a keyboard business. The people at MNT did a lot of testing and set a high bar that I can’t match I’ll keep showing my progress, and it’s open source if others want to fork and improve.
I like the idea of using the Elite-C as a daughterboard; it makes the assembly a lot more approachable. It looks like there’s a new v4 of the Elite-C which is even more low-profile.
Where do you have the Elite-C in the current design? If it were me I’d just toss out keys mercilessly to make room (who needs a number row!) but I get that not everyone is accustomed to the fn layer as I am.
Hi again, we now have a solution for avoiding the MNT trademark on derived OSHW designs while still referencing MNT Reform / showing that your product is meant to be compatible:
Progress update, with an unusually bad photo. There is room for the elite-c keyboard controller while keeping all keys, and for the keys in the upper corners. I needed to move the thumb keys another few mm, but they should work. Thanks to nice folks at keeb.io, I was able to get the x,y location for the USB pins on the elite-c, and should now be able to route the board.
oh that’s cool. when my MNT shows up (Crowd Supply asked me a month ago to change my mailing address from a PO Box to an address, no movement since), and if you get a chance to push that new PCB design that leaves room for the full MCU, I’d be happy to give a go at testing this with a SparkFun Pro Micro - RP2040 - DEV-18288 - SparkFun Electronics (I have several here, but they’re otherwise backordered indefinitely, RIP) and my Python-based GitHub - KMKfw/kmk_firmware: Clackety Keyboards Powered by Python. the controller should be fairly drop-in compatible, and the Python layout definition should be manageable (though I haven’t played with OLEDs on KMK - I think the community has contributed PRs over the past year or two tho)
The chip shortage has made this project a pain. I routed a 32u4 tqfn, but no board house can get the part for less than $40 now. The pro micro form factor just doesn’t have enough pins for a 60key + serial + i2c. My idea of using an elite-C won’t work because it’s 5 volt only, and I didn’t want to level shift everything. I may come back to that. I tried with a Teensy2, and could only find the through hole version of the voltage regulator.
I’ve finally settled on the adafruit itsybitsy 32u4 3volt. It’s cheap & in stock, and it has enough pins if we air wire from the USB socket to the board.
My last step is to find a power switch that fits on the board so that I can cut power to the keyboard. That should allow a range of firmware without worrying about the power save states.
It retains almost nothing of the original MNT design
New ergonomic switch layout. I moved the thumbs another few mm.
Using an Adafruit 3 volt itsy-bitsy as the MCU daughterboard. The USB connection is a chopped up USB cable. If you want to use a different MCU of roughly the same width, all pins are broken out.
Switched to 0802 or larger SMD parts and used the “handsolder” footprints as much as possible.
Removed backlight LEDs that I don’t use, and added a dozen RGB LEDs. Enough for status lights and locating the thumbs.
Added optional kailh hot swap sockets. Probably won’t work inside the laptop, but it makes prototype & desktop versions cheaper.
Power kill switch/jumper.
I’m going to order boards & see how I did in the next few days. Comments & patches welcome.
How much space do you actually have, vertically? I’ve been dreaming of a through hole design, possibly kinda split ortho with the mcu & stuff in the middle. but the mcu for that might be too fat?
The layout fits and I’m fairly happy with it. The lowest thumb keycaps needed a bit of trimming, but they’re comfortable.
The board works with QMK outside the reform, and I figured out serial code that should talk to the LPC and display battery voltage on the OLED using the same font as the stock firmware.
… And in the process of plugging it for final testing I broke something on the motherboard. Until I have a repair or replacement, I’ll have to put the keyboard project on hold.
Keyboard is mostly working now with the stock firmware. I’ll upload as soon as I get through my current bug list. (wakeup from LPC sleep, one inexplicable missing key).
QMK isn’t going to happen soon. I think it will need to change main() to delay usb initialization until after the LPC has been found.
Powersave is stopping me. I think I got all the bit math correct in ergo_reform/powersave.c at main · milestogo/ergo_reform · GitHub to watch the correct pins. But it doesn’t work at all. On first power up, the keyboard talks to the LPC and all is well. When I put the keyboard into suspend, nothing comes back until I reset the MCU.
I’m starting with devkev@'s patch. Either I am making a simple bitmath mistake, or there’s a hidden re-use of the AVR pins that I’m just not finding.
 I’ll keep showing my progress, and it’s open source if others want to fork and improve.

