The problem:
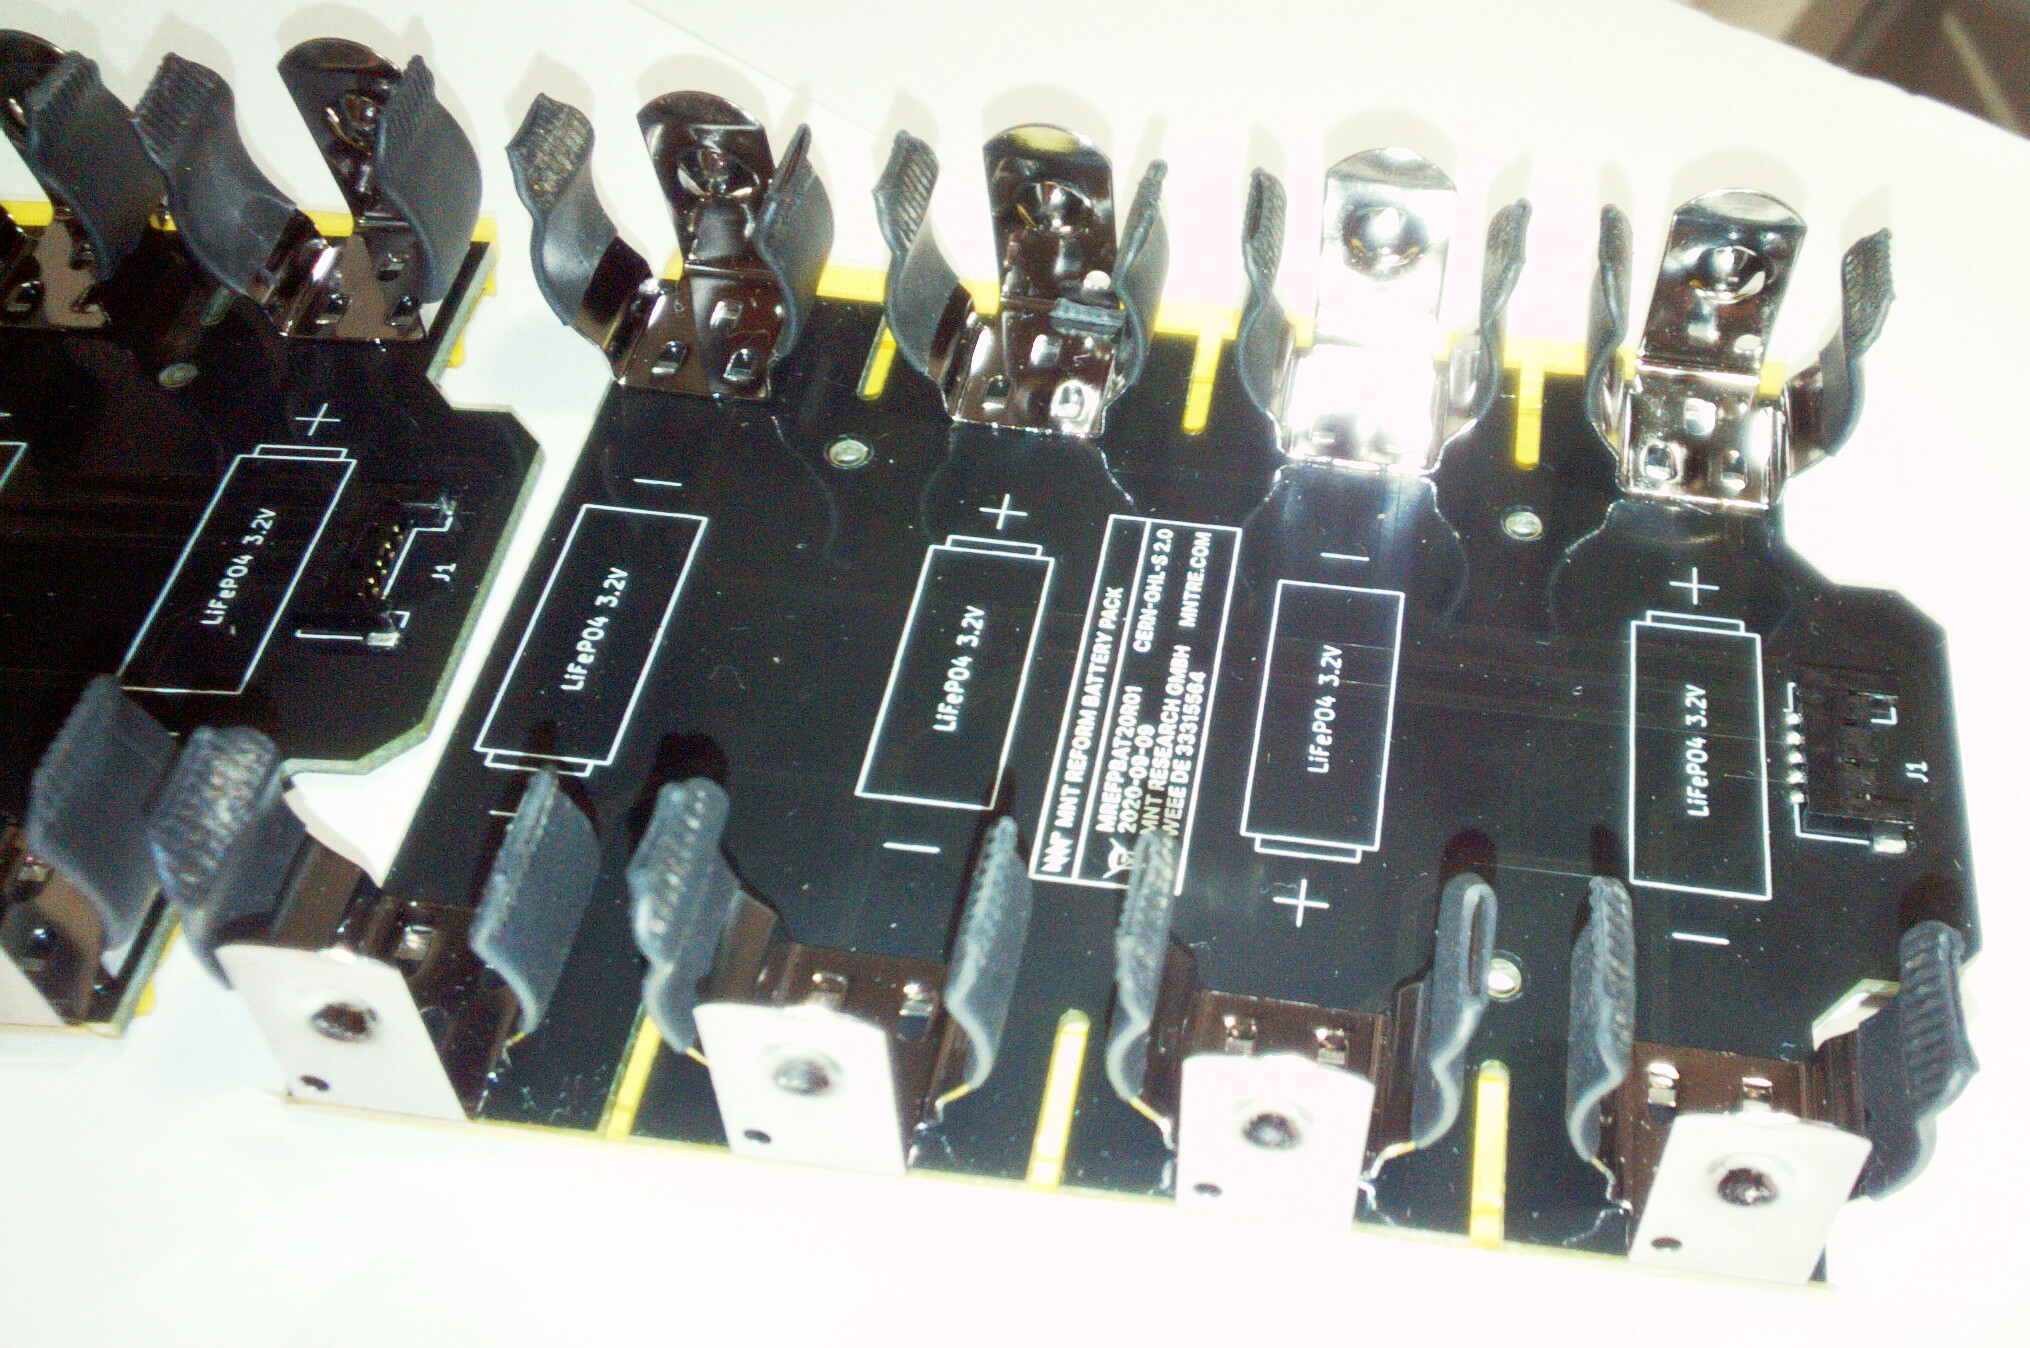
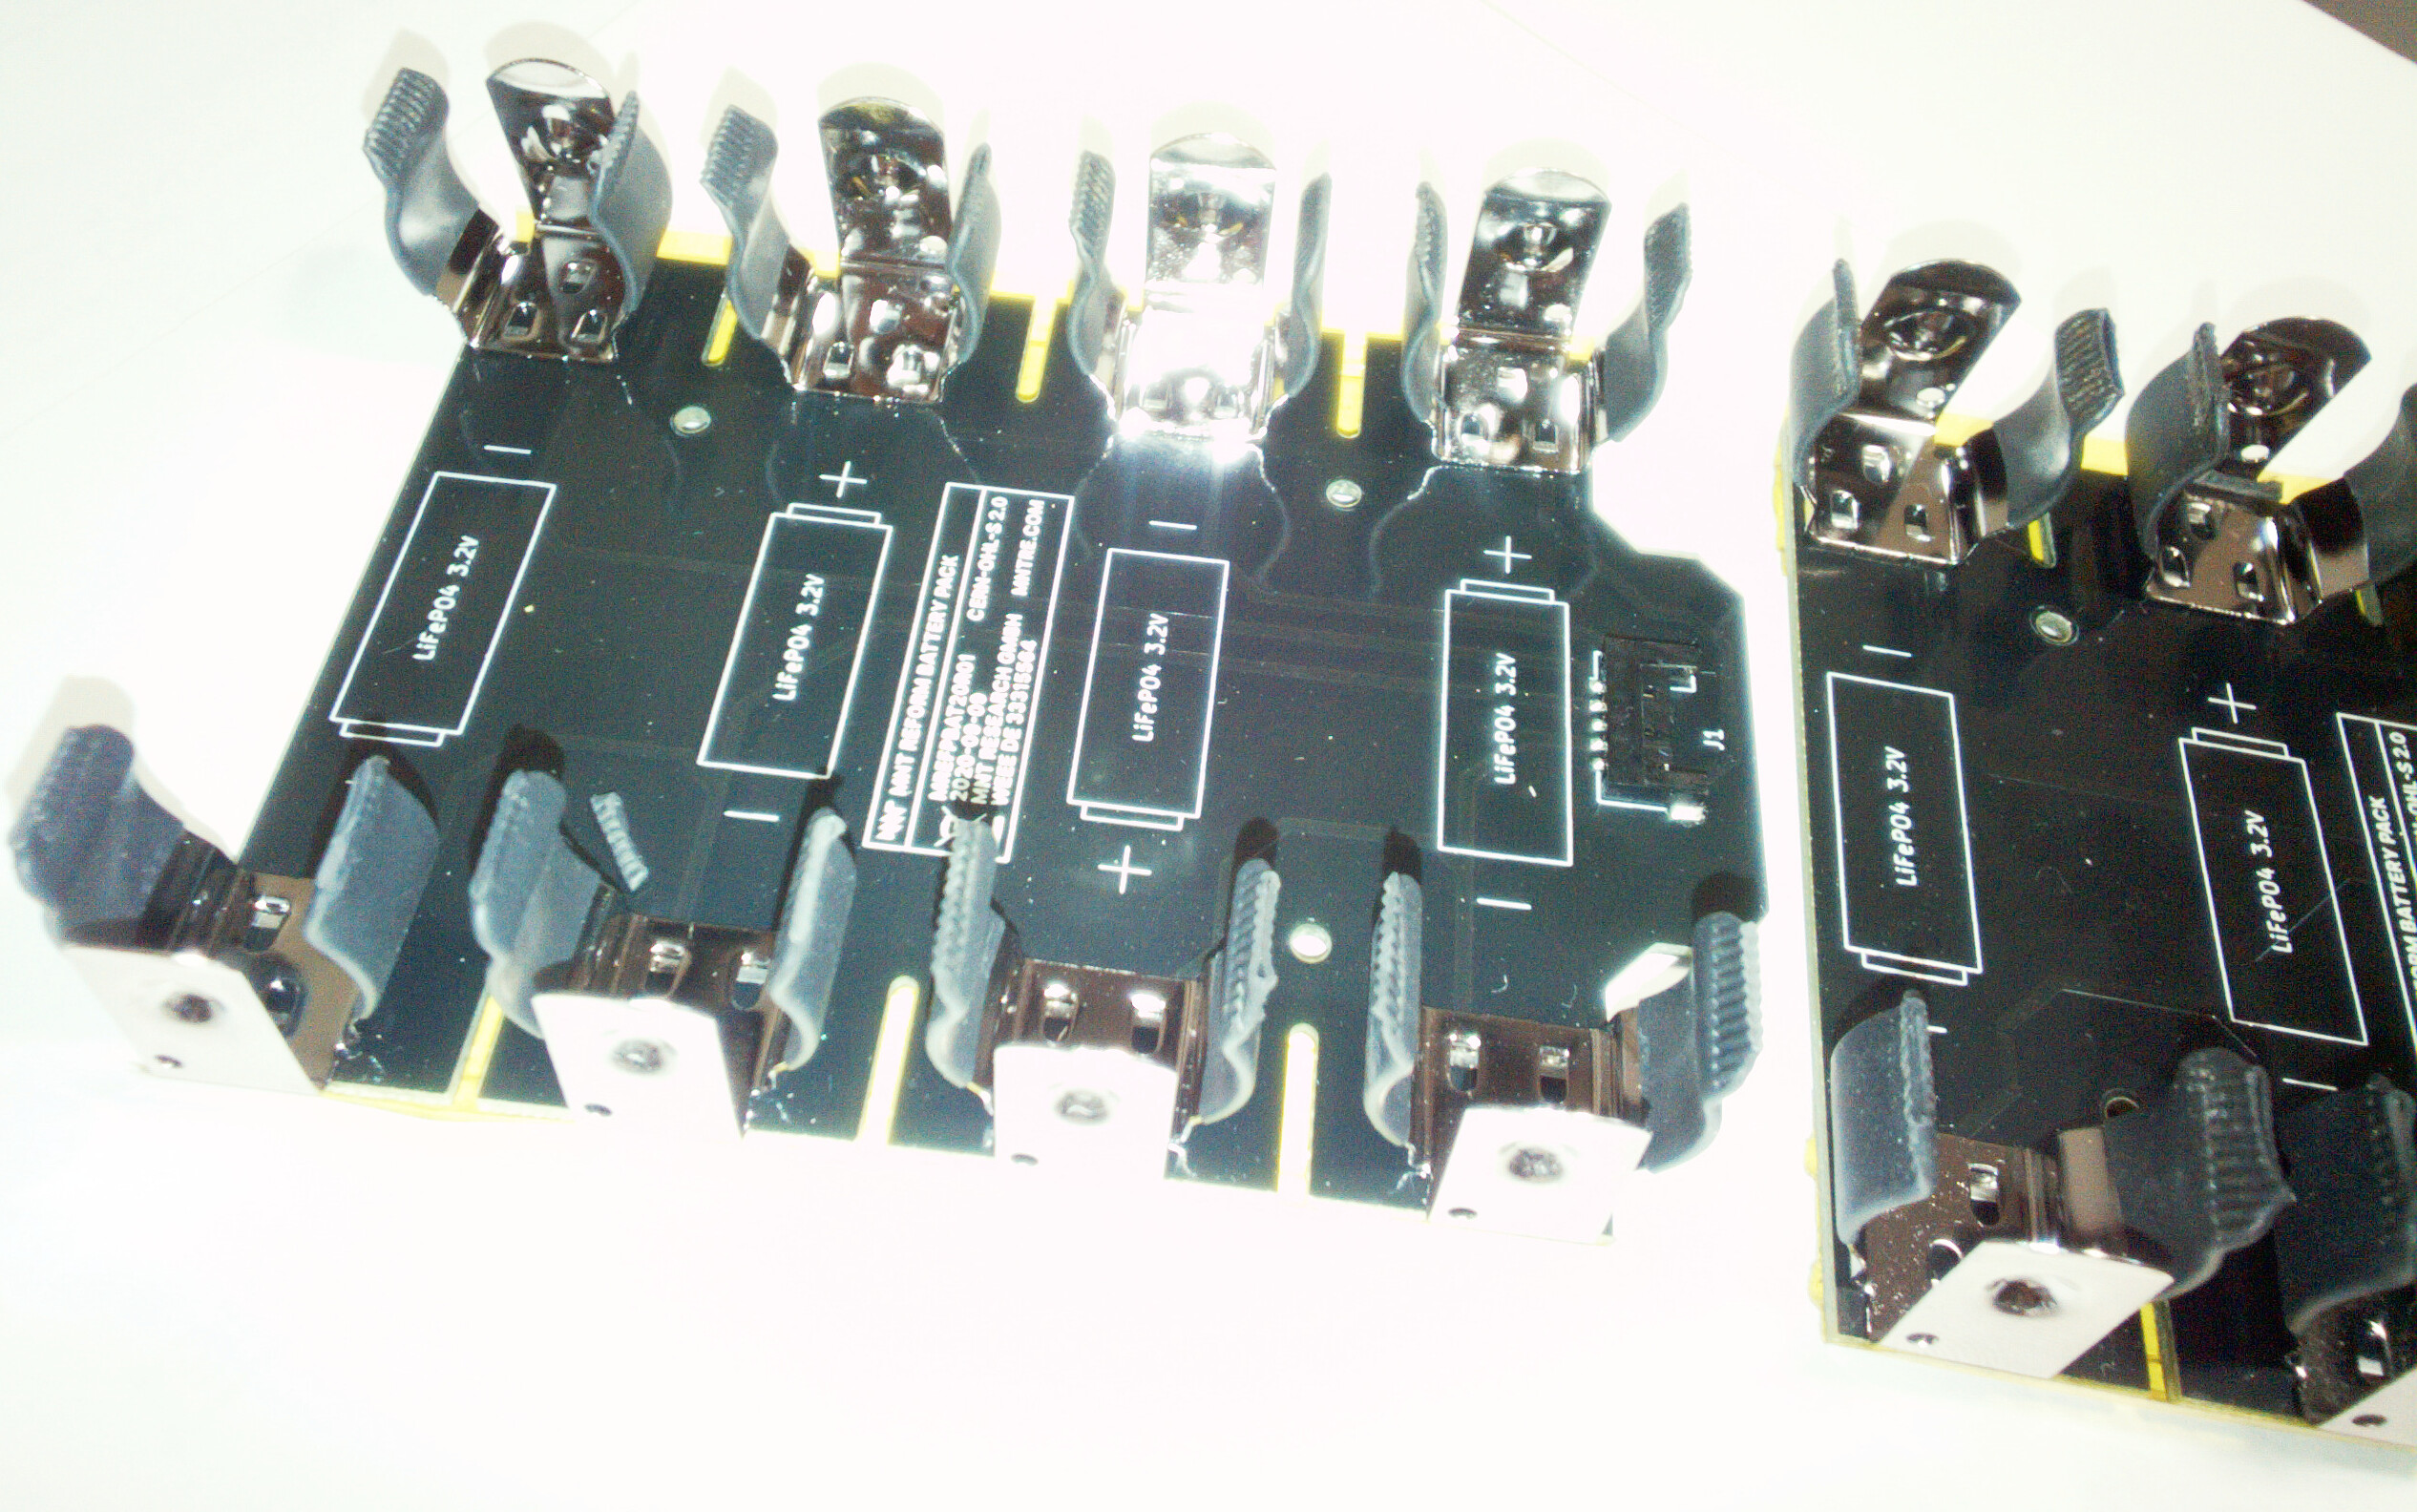
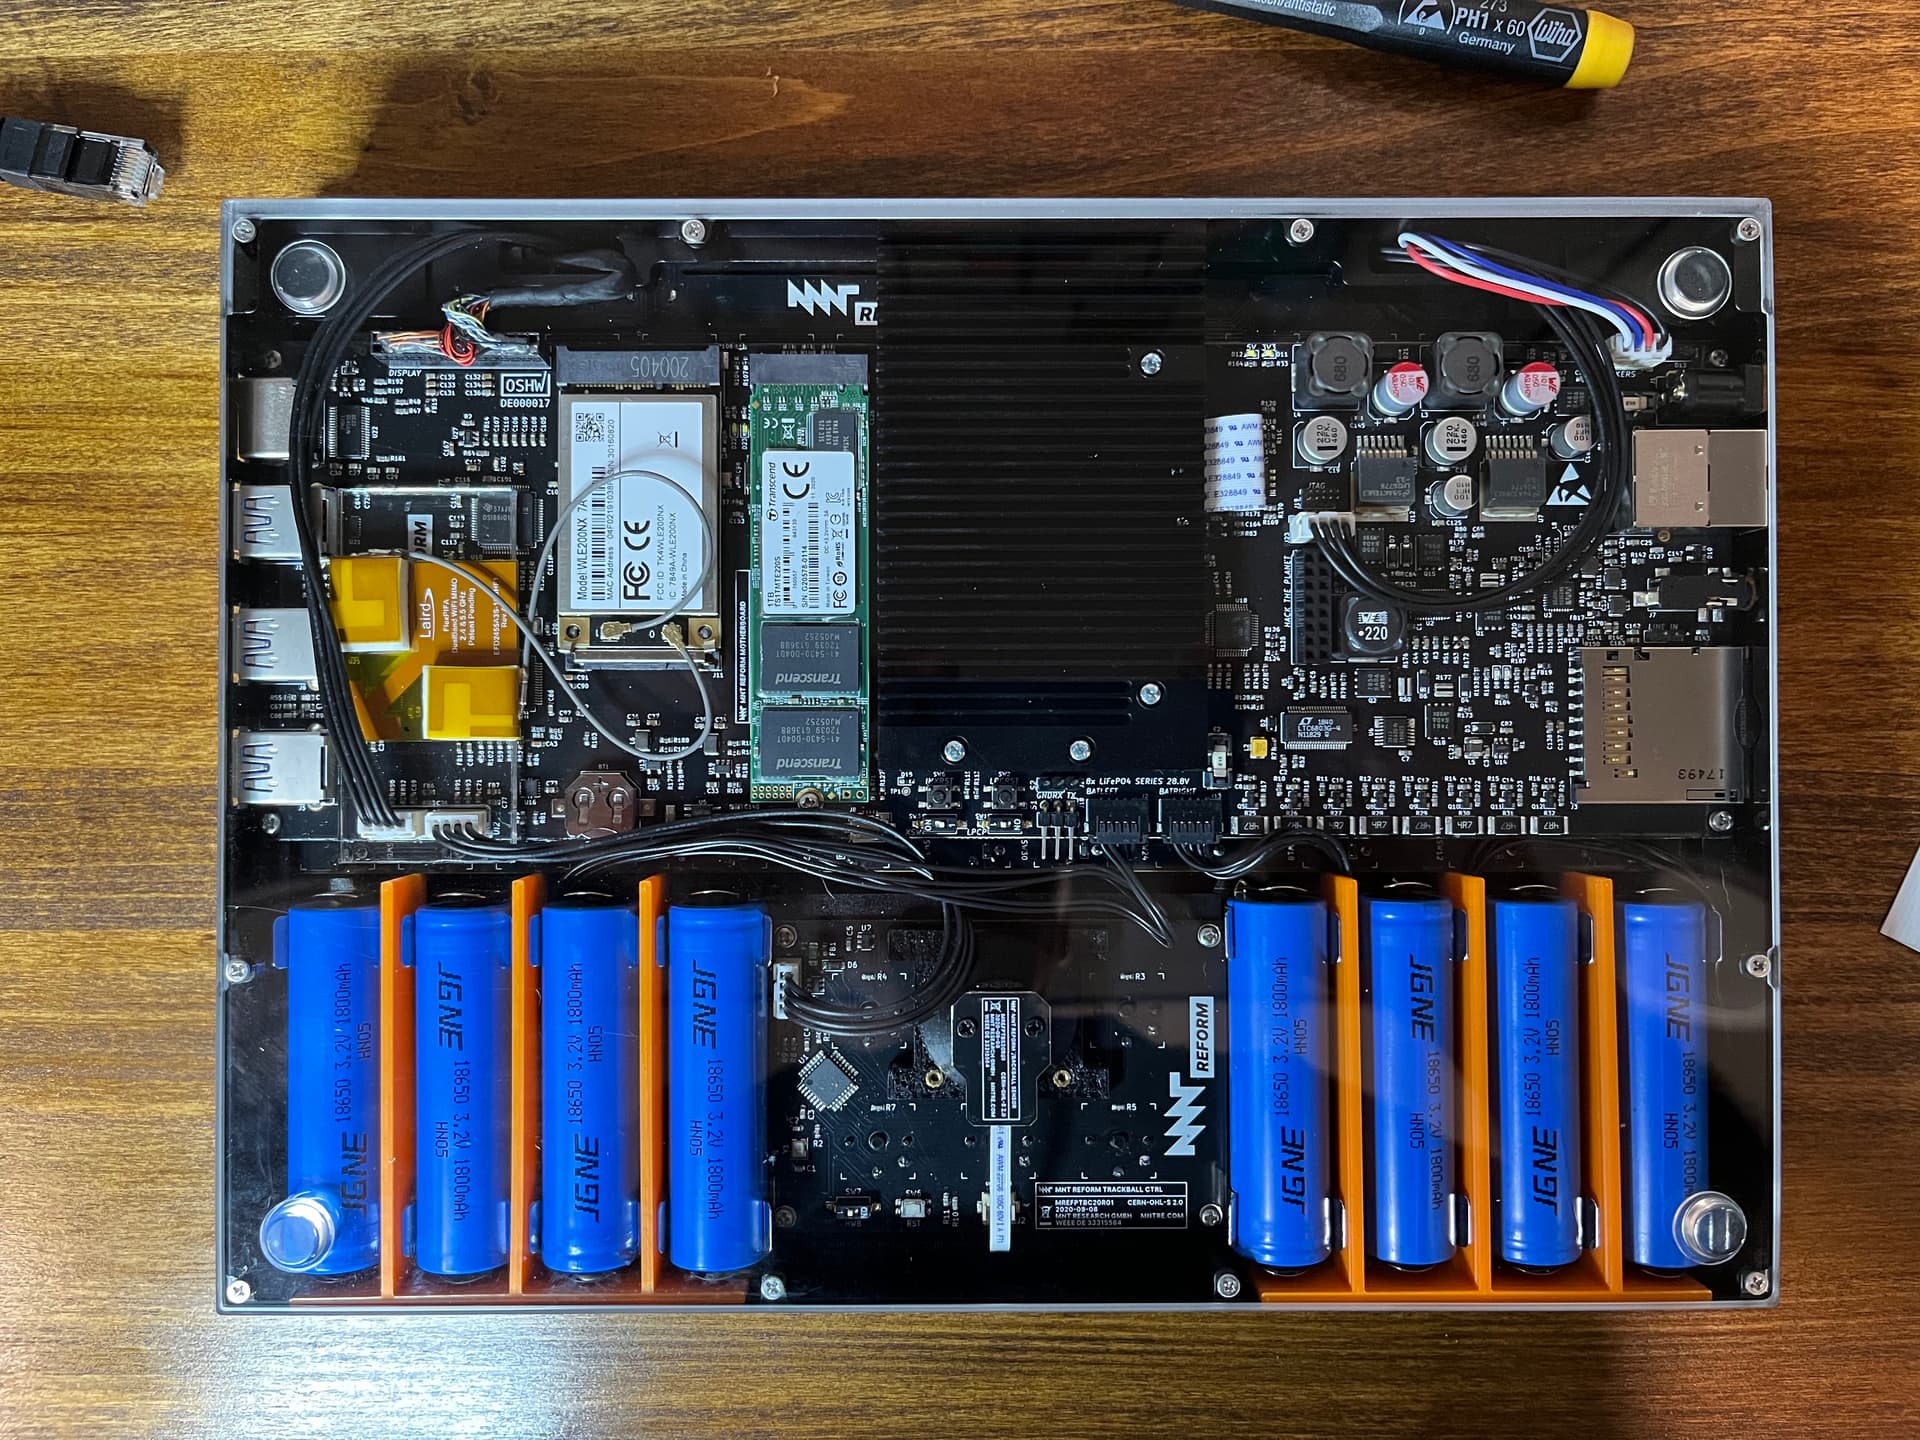
One thing I noticed soon after receiving my Reform is that there’s not much clearance between adjacent battery clips. This is especially true when the batteries are installed, and even more so whilst inserting or removing them, ie. the clip opens up a little more when the widest part of the battery’s diameter passes through the very top. Additionally, the clips naturally allow a certain amount of sideways flex, which can easily occur when trying to prise out the batteries (because there’s not much room for your fingers to get around the batteries).
The problem is that the entire clip - including the round side parts - is connected to its battery’s terminal. Since the batteries are wired in series, they are oriented “head-to-tail” along the board. This means that if two adjacent battery clips are accidentally touched together - which, as above, is a distinct possibility if one is hastily/carelessly inserting or removing the batteries - and they are a pair of clips which aren’t already connected together (by a trace on the PCB) in the “head-to-tail” chain, then this will be a direct short-circuit of those two cells:
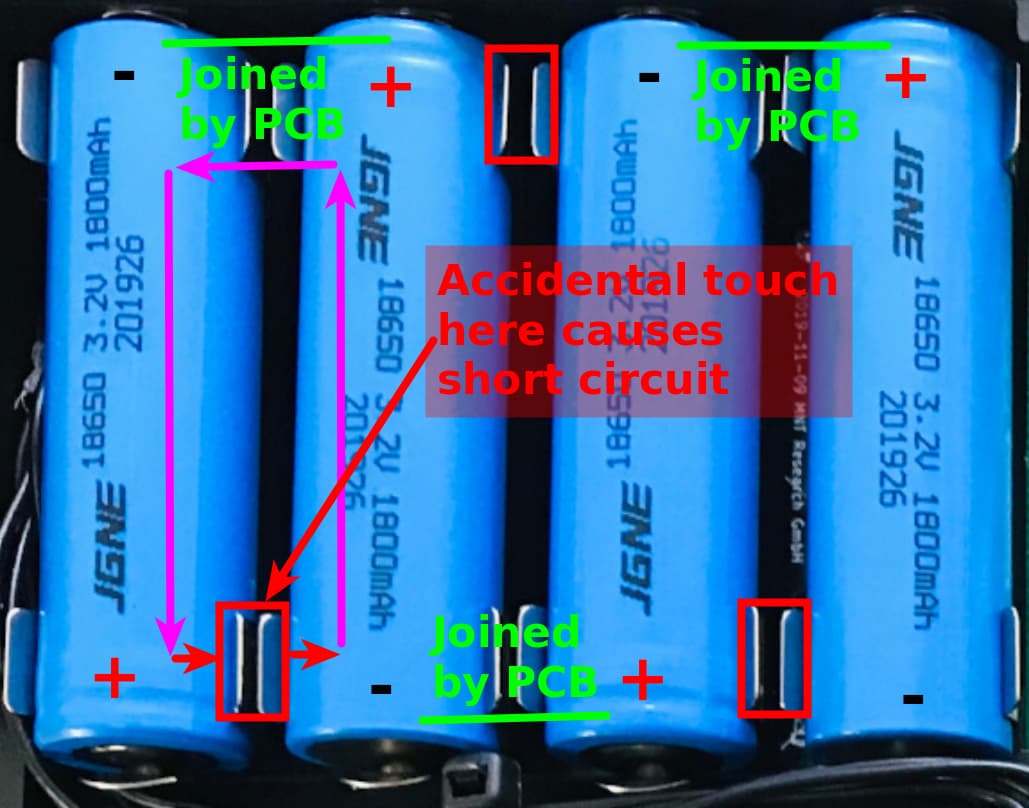
This will burn the corresponding trace on the PCB and (I assume) destroy those cells, and is almost certainly what happened on an earlier thread:
Before touching any internals, I started to remove the batteries, beginning from the right. I removed all the batteries on the right side with no issue, but when I started to remove the batteries from the left side, one stuck for a second and then I saw smoke appear. I quickly removed the battery before anything else happened but it seems part of my board is now charred.
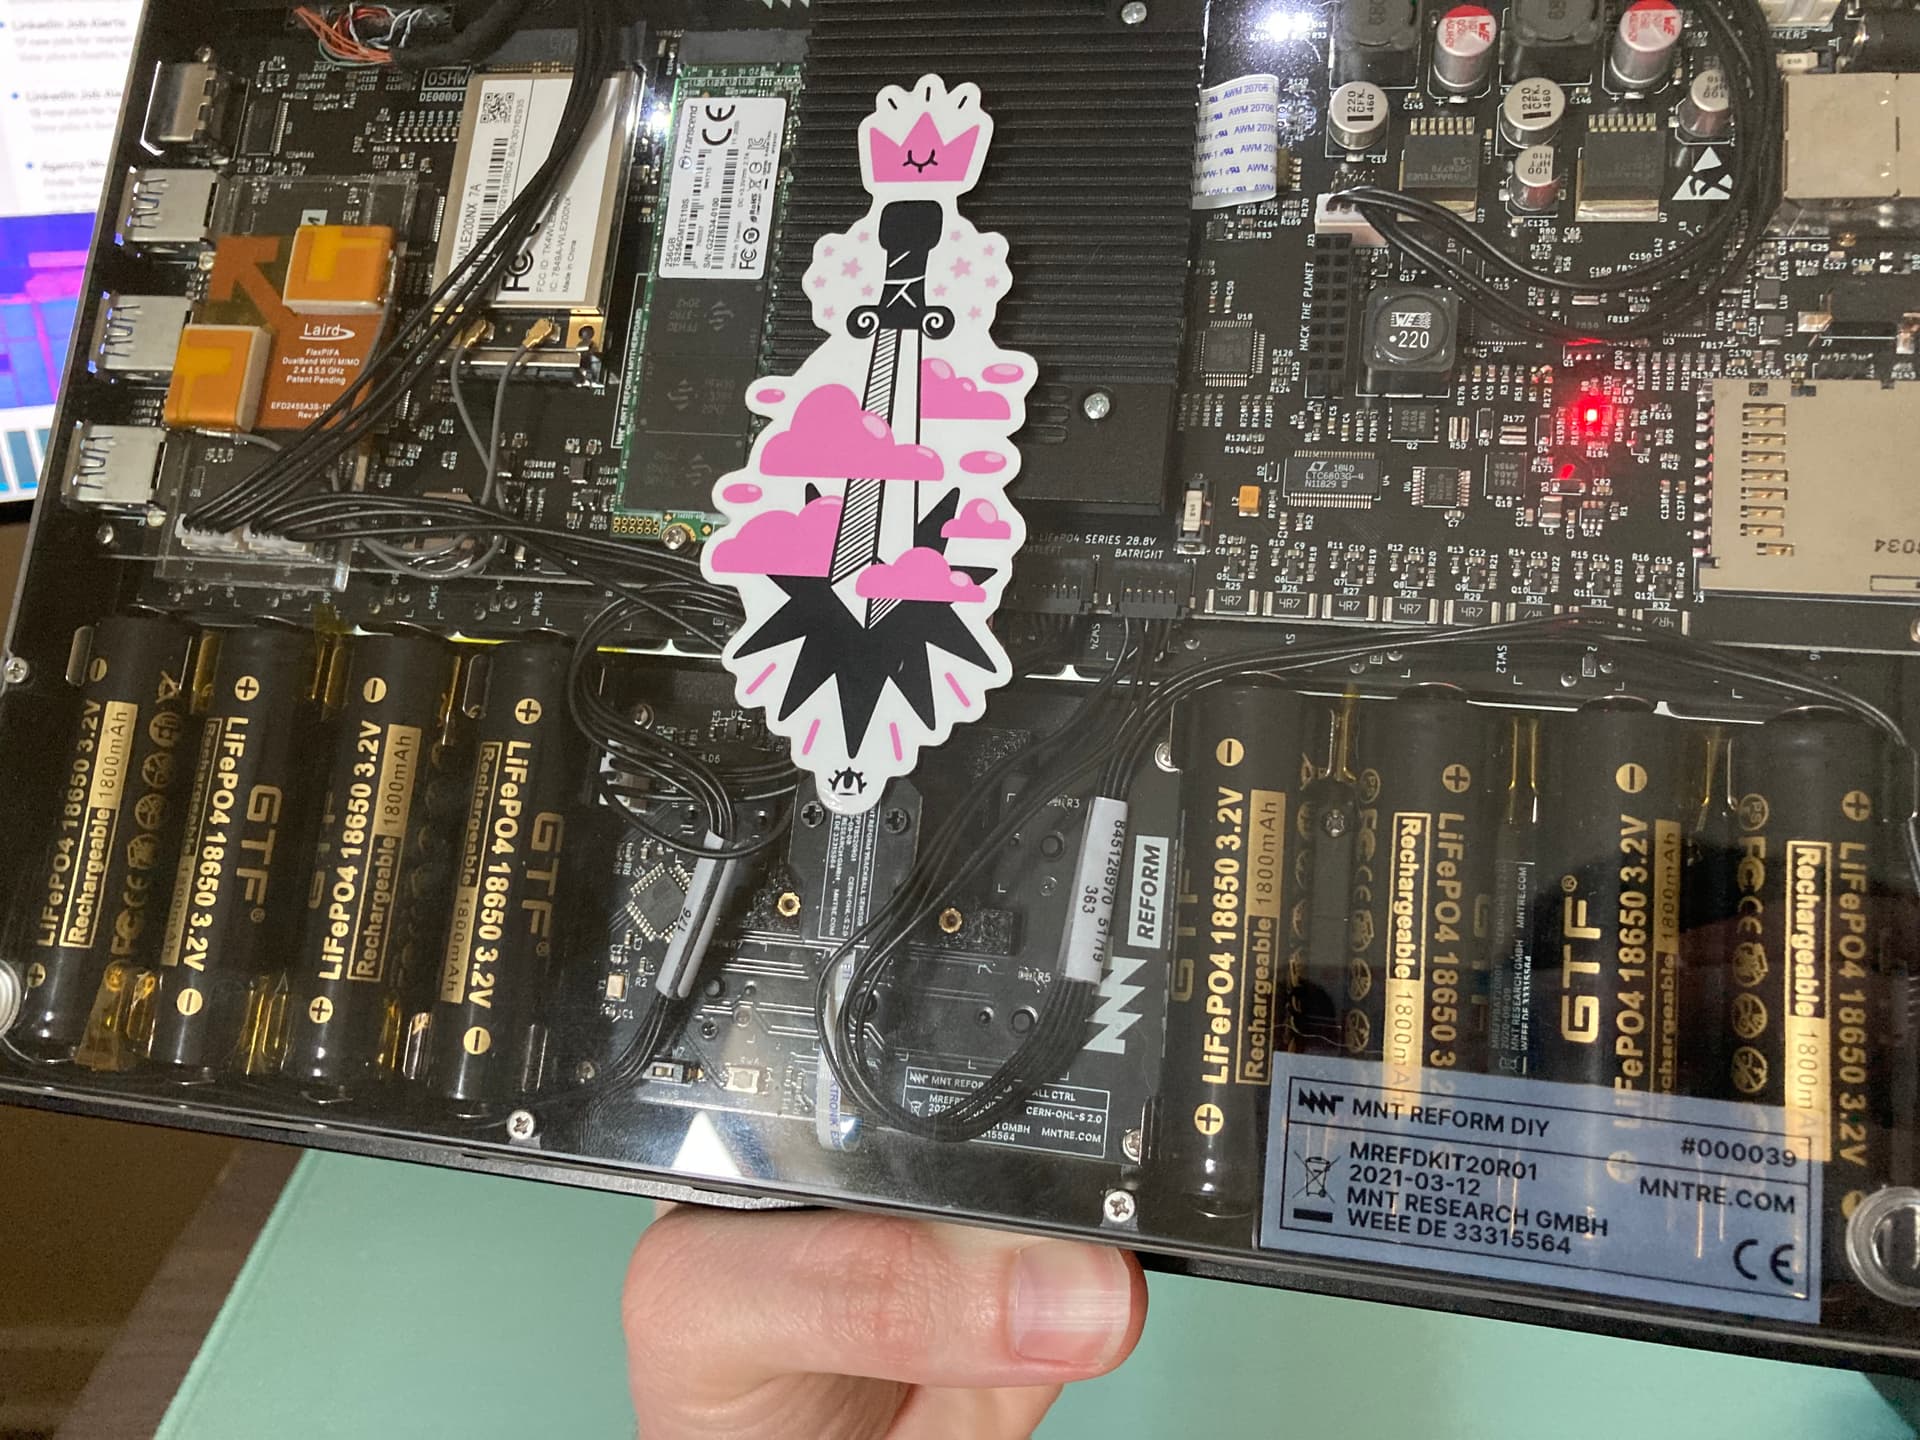
This is rather disturbing because it can even happen if the battery PCB cables have been unplugged from the motherboard - and even if the battery boards are completely outside the laptop (eg. just sitting on their own on a workbench).
This means there’s still a chance of a dangerous short-circuit, even if the best practice advice is followed (ie. never use metal tools, always disconnect the battery board cables from the motherboard, and always remove the batteries from their clips).
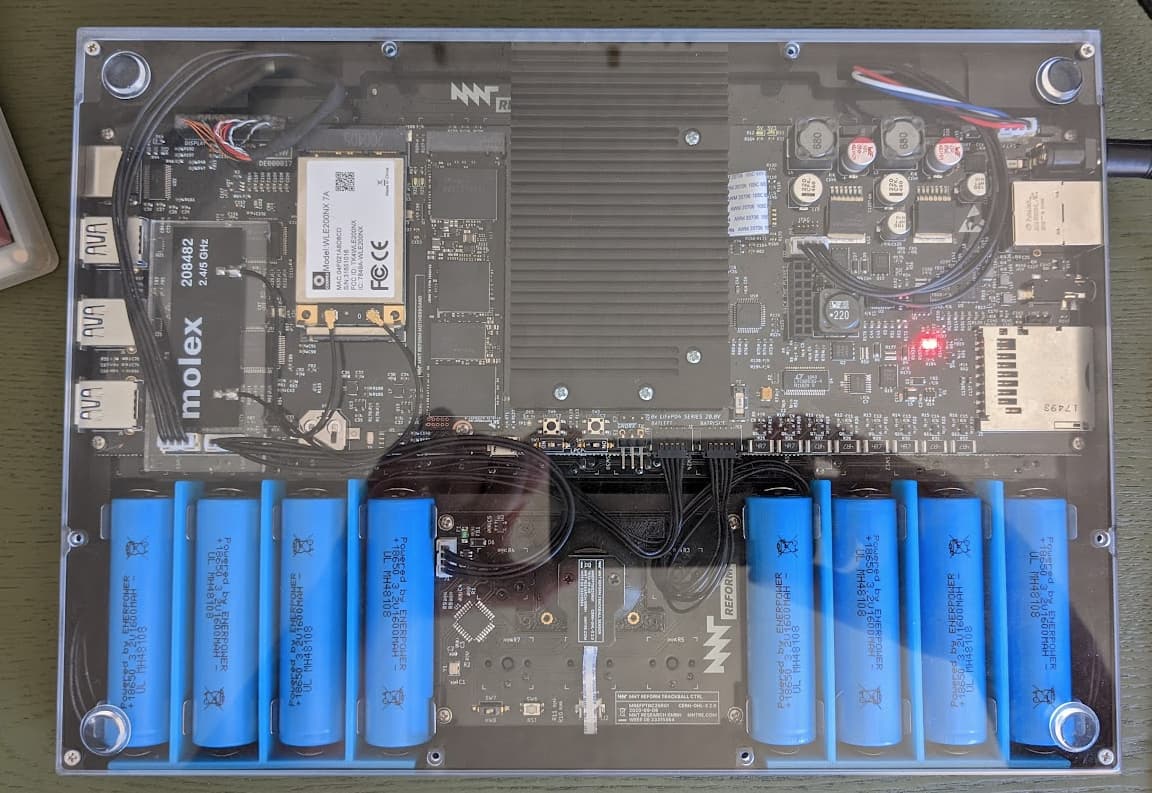
I also found it a little concerning that the clips are so large, to the point that they could maybe be shorted out by an accidentally dropped screw or screwdriver, eg. immediately after the bottom panel has been opened, but before the next steps of unplugging the battery cables and removing the battery cells.
My solution:
I wanted to solve this for my Reform in a way that would minimise my need to be worried about it while doing other work inside the laptop. My first attempt was wrapping electrical insulation tape around some of the clips; while this worked, it was difficult, clunky, and fairly ugly.
Next I used 10mm heat-shrink tube, which worked a lot better (though still pretty clunky/ugly):
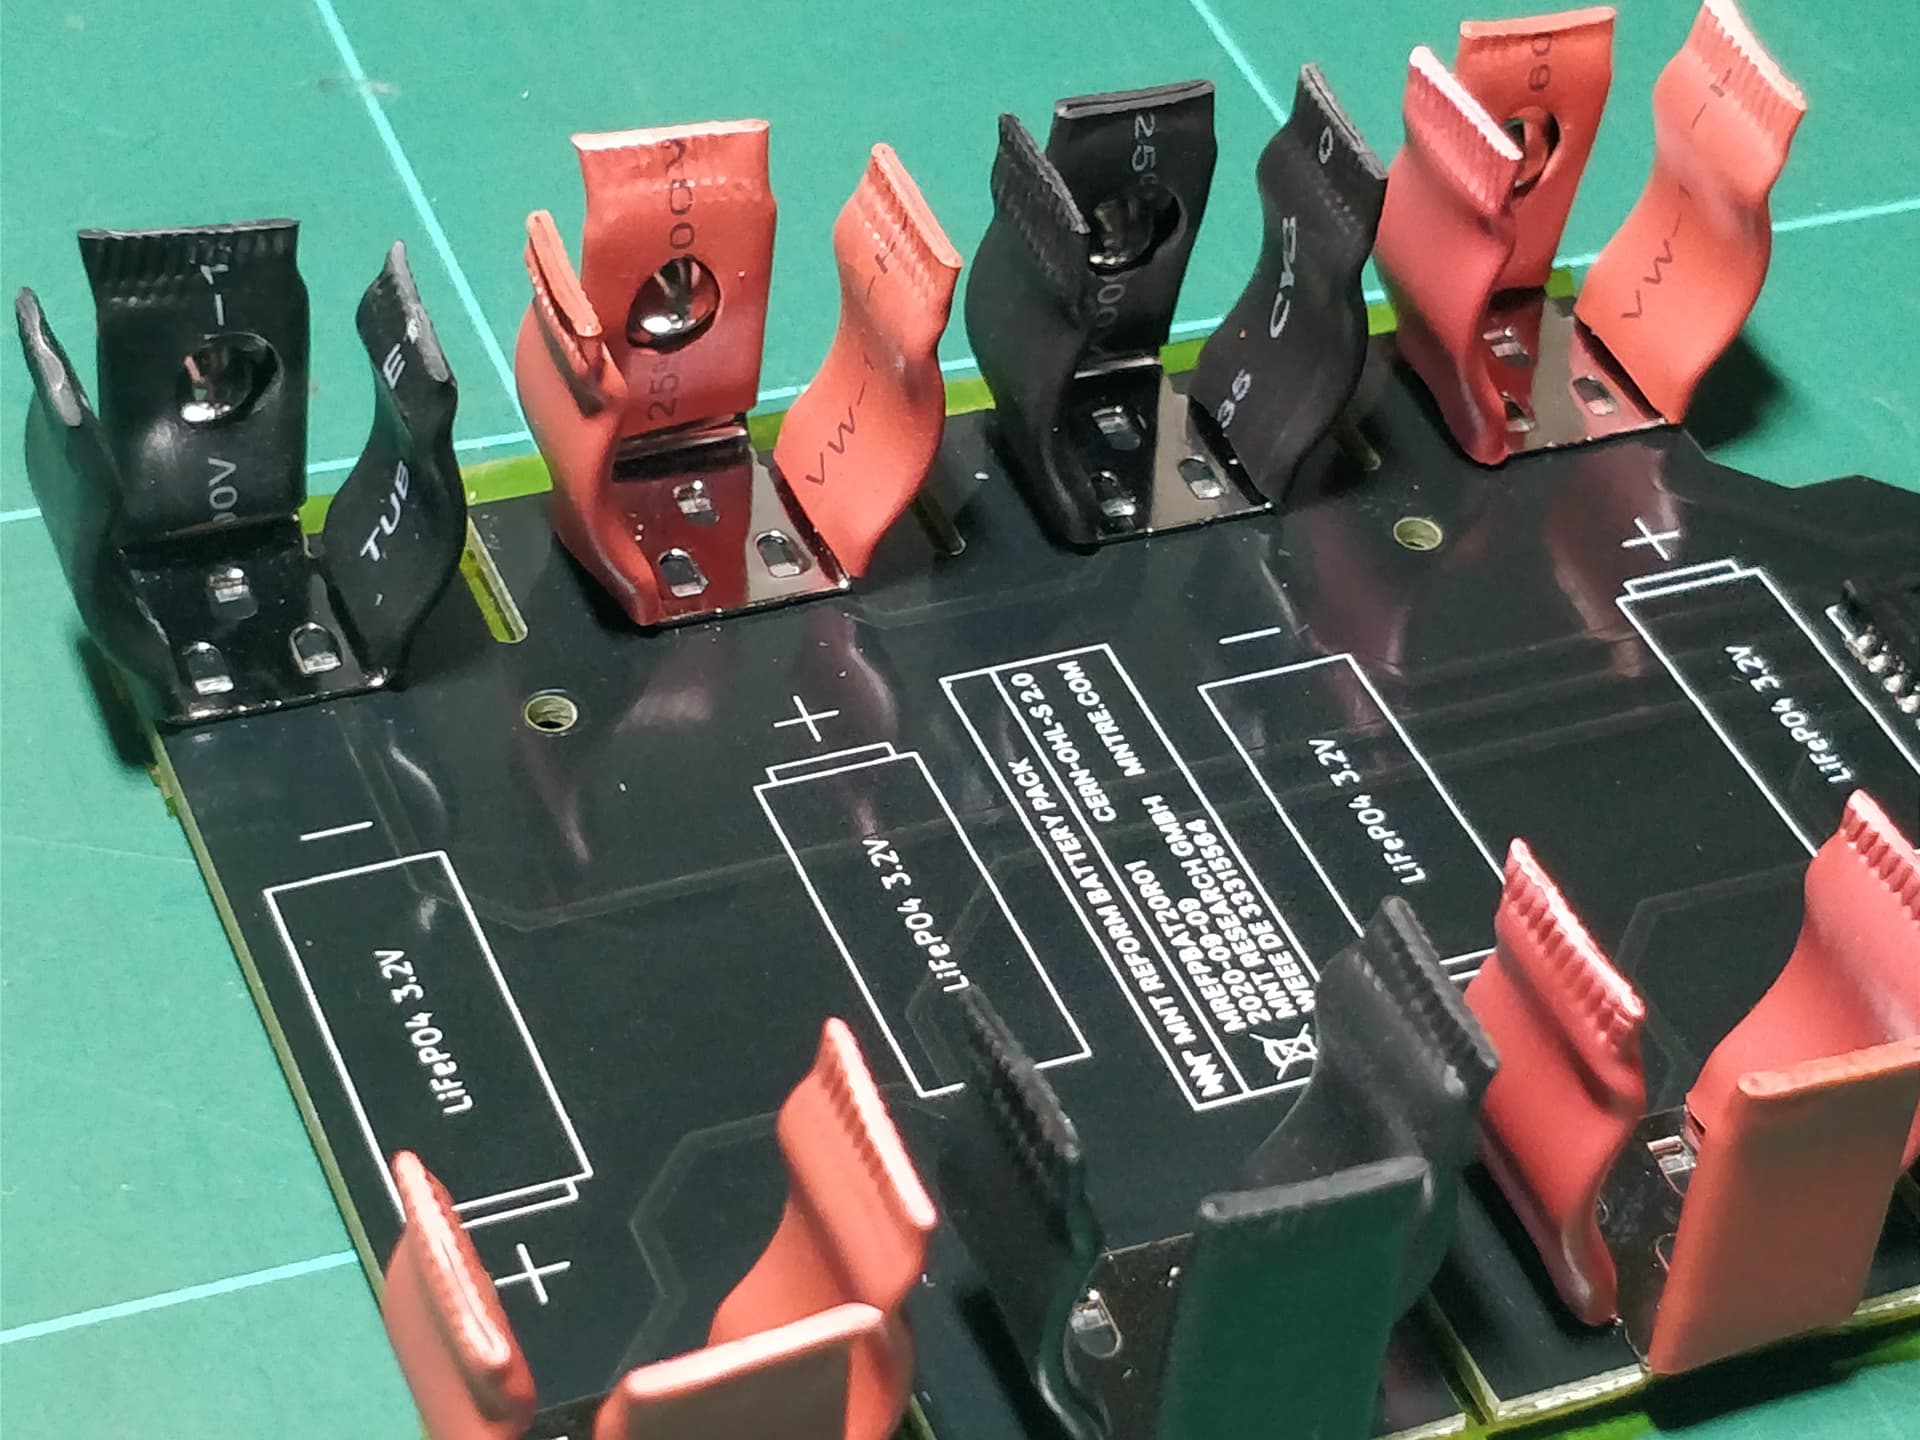
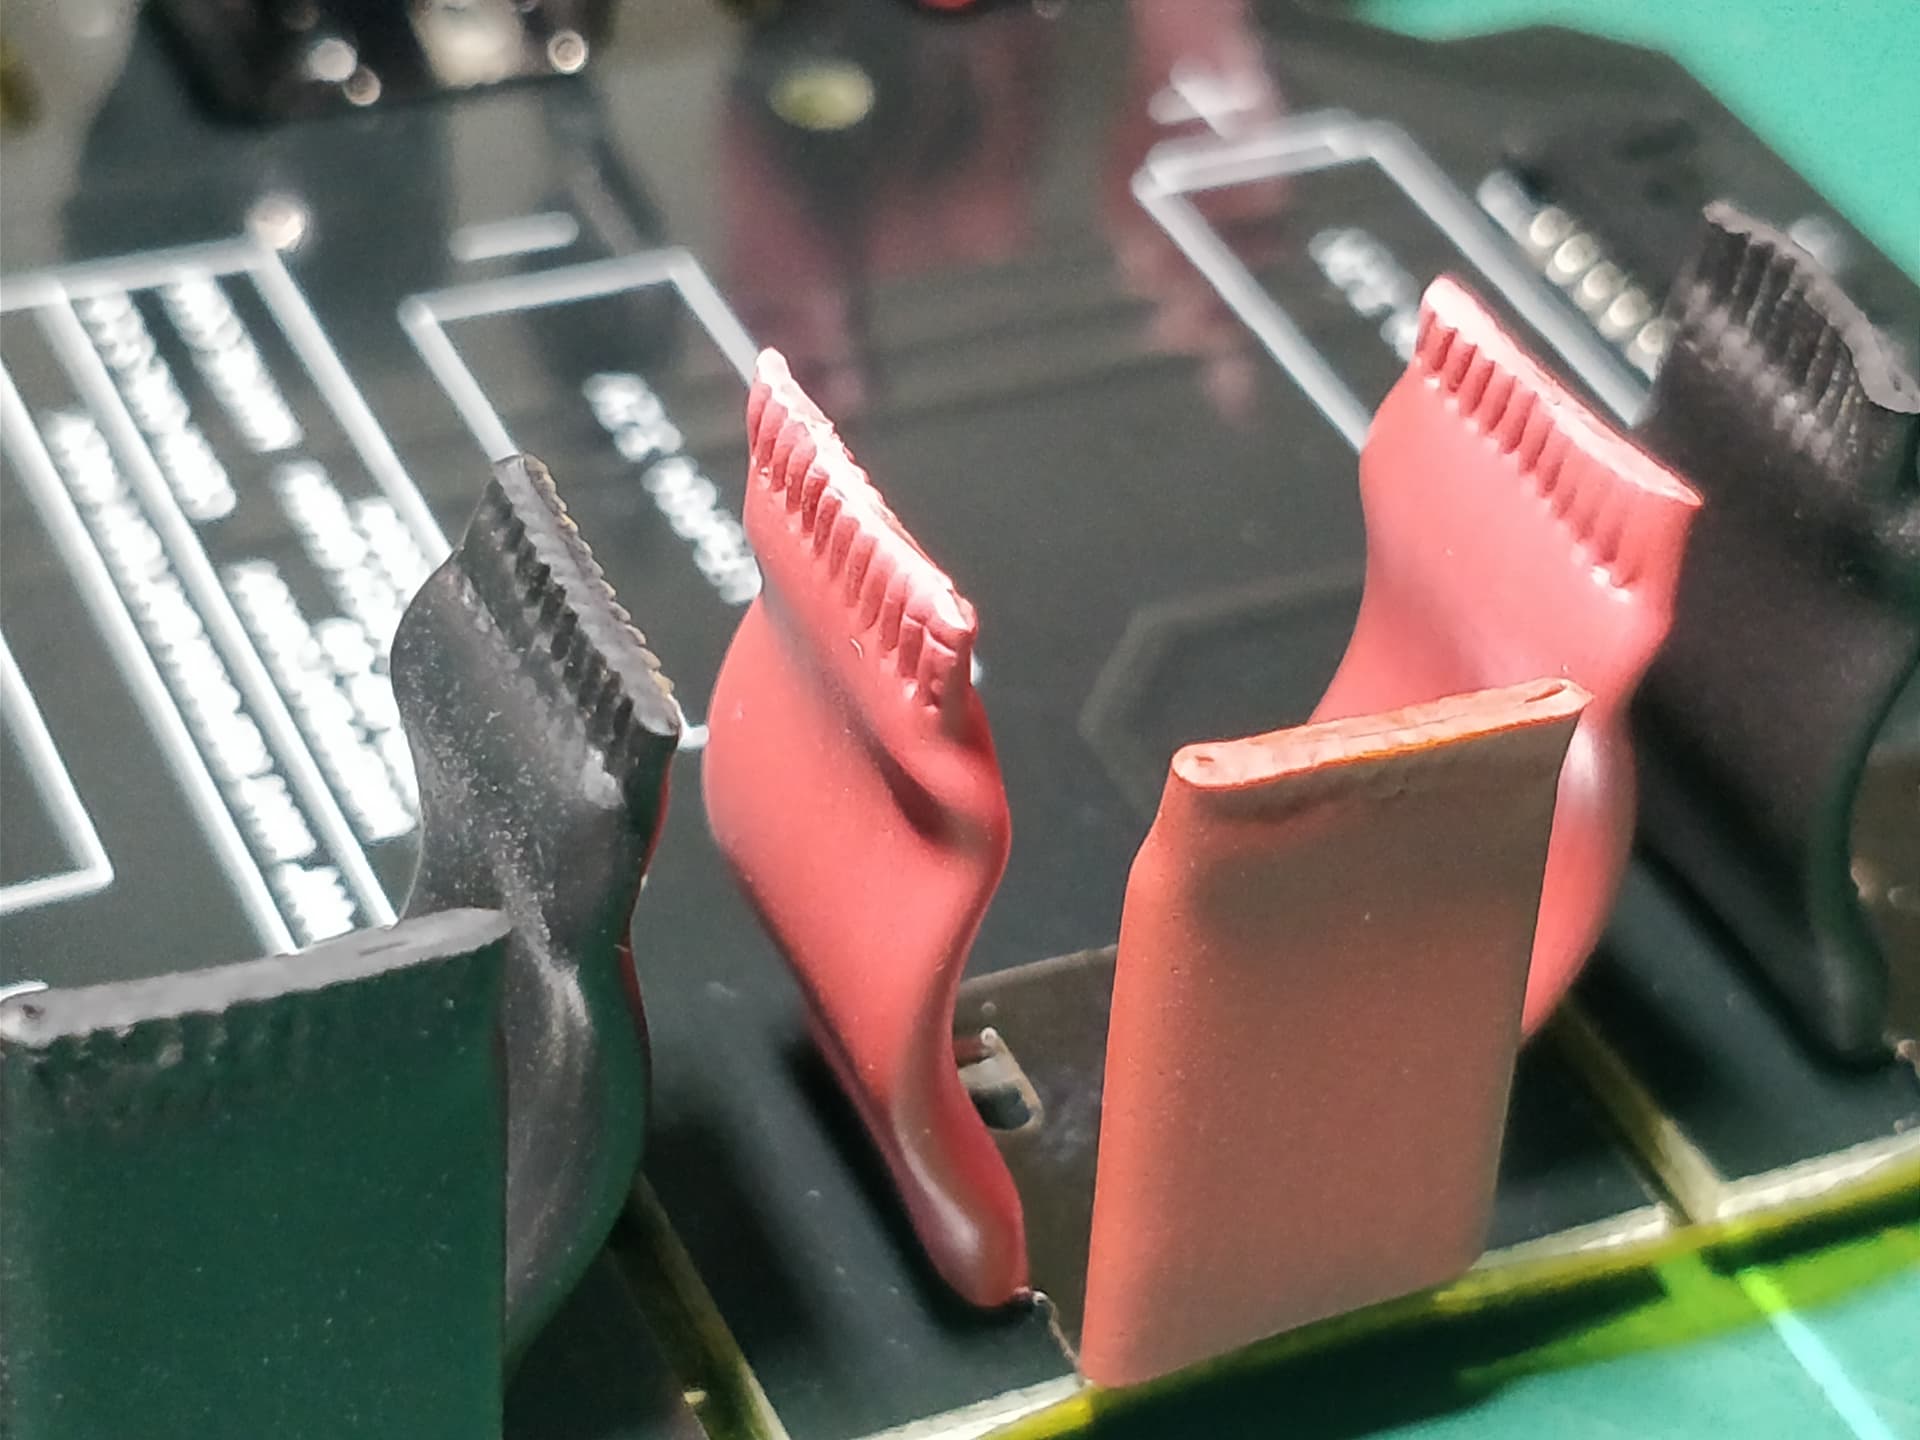

Even though it’s only necessary to cover a minimum of 3 clip-edges (per board) to protect against this issue, I decided to do all of them for a more uniform look (and better protection against dropped tools/screws). I also used red and black tubing to get a better visual indication of battery cell polarity.
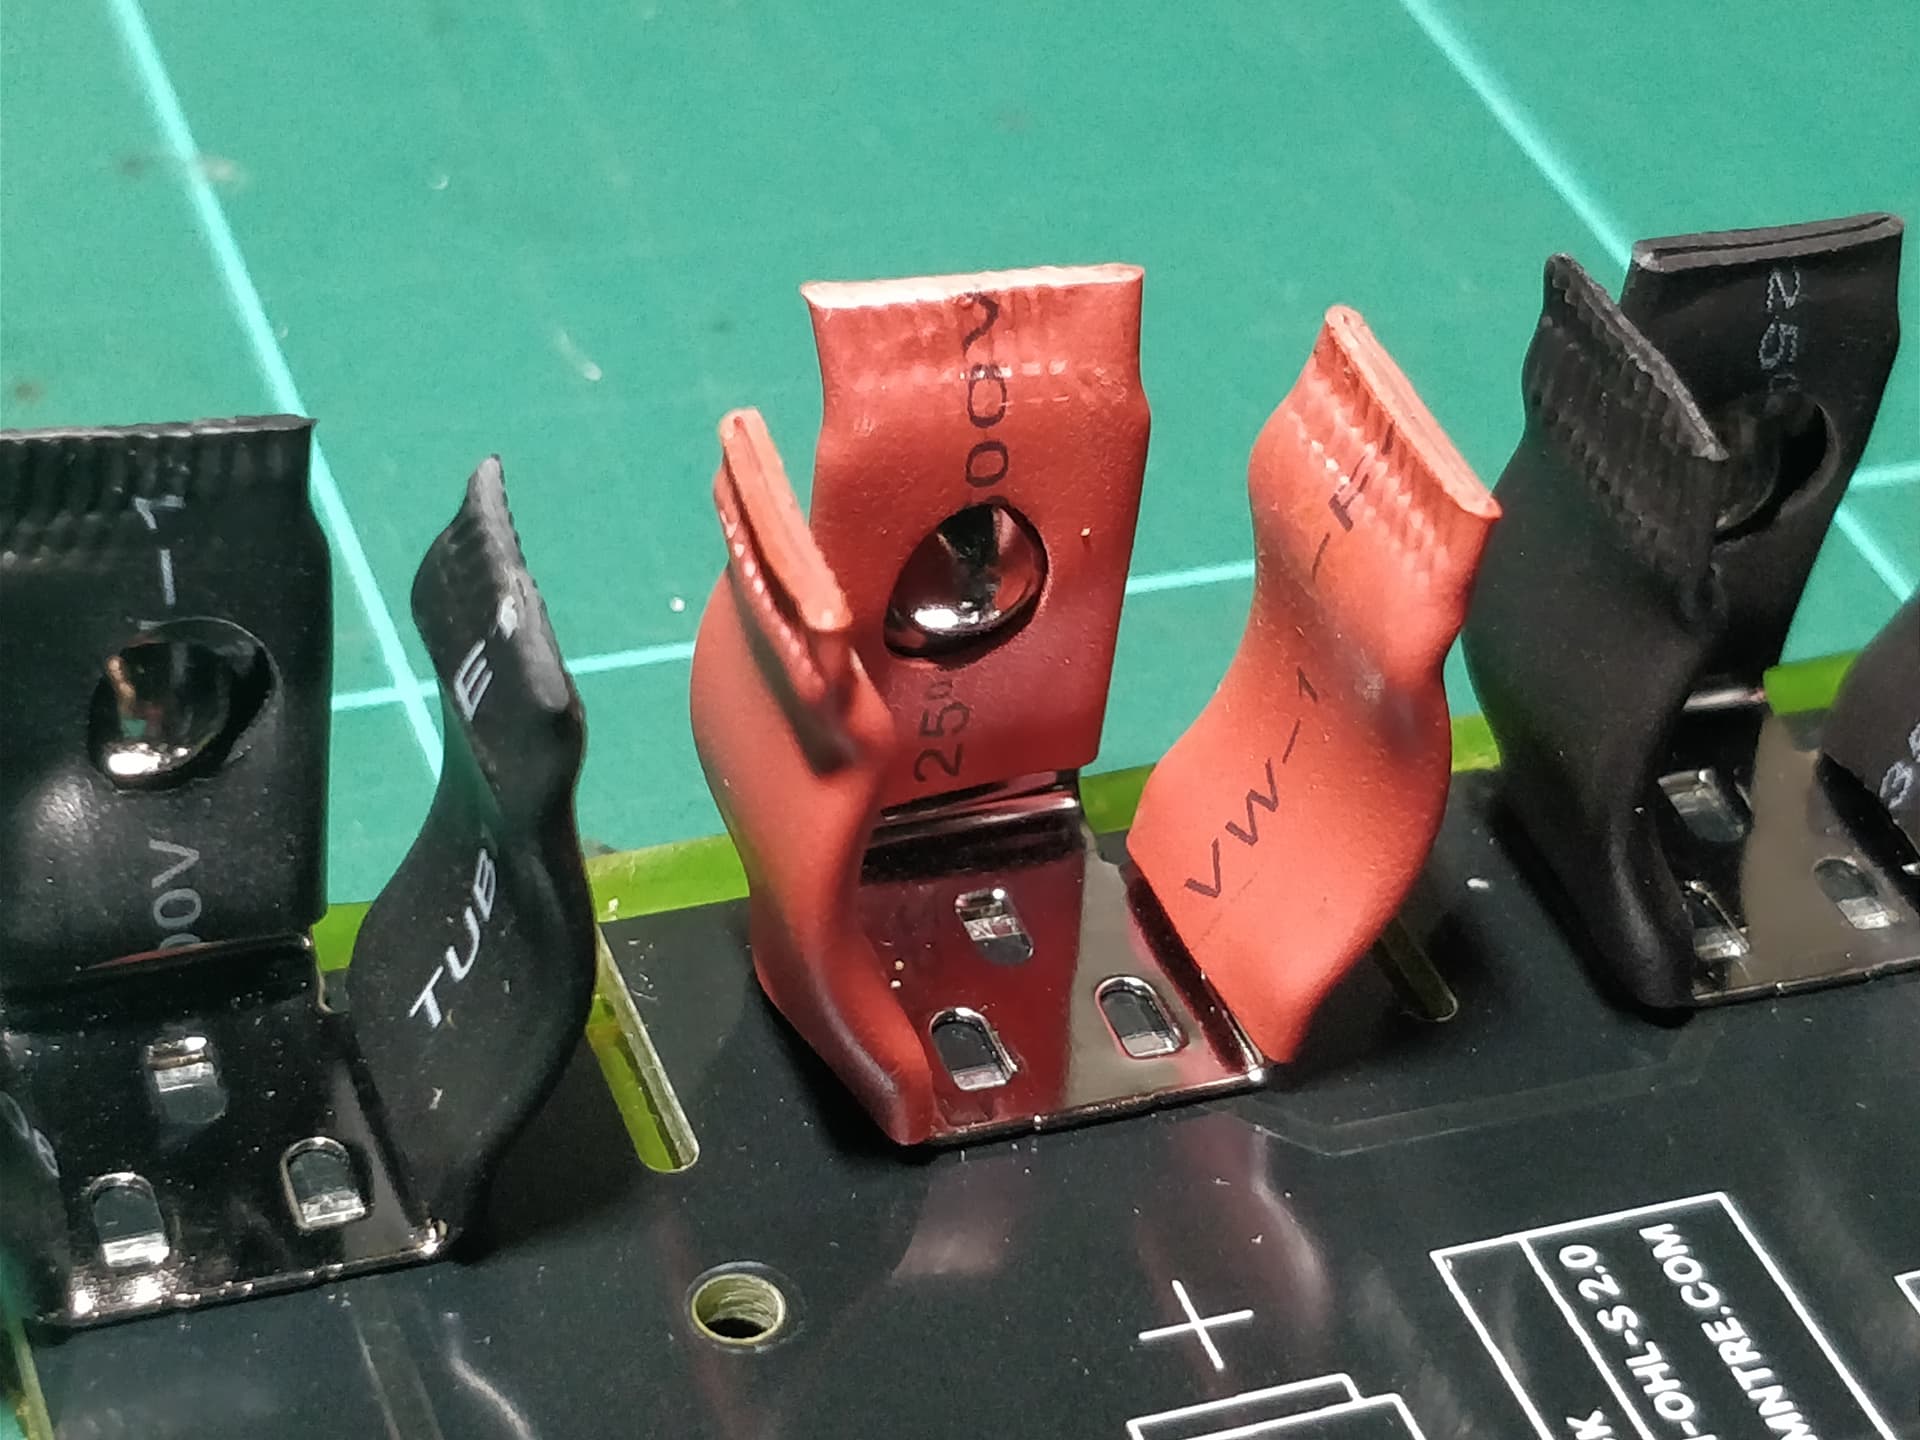
The tops were crimped with long-nosed pliers while still warm, to avoid exposing the top edge of the clips. Some were a bit too tall, so those were cut down with scissors/angle cutters so they didn’t impede the bottom plate.
I also did the actual battery terminal “legs” of the clip, by using an office/craft hole-punch plier to make a hole in the heat-shrink tube (before shrinking it) for the “nub” of the clip that contacts with the battery terminal. Again, this is just to have less exposed metal inside the case which is directly connected to the batteries.
The main downside is that the extra thickness of the tubing, plus the extra friction of the rubber (not metal) clip surface, means that the battery cells are even harder to get out (especially with bare fingers). I solved this by putting a length of electrical insulation tape around the end battery on each board (before clipping it in), which serves as a “puller” (inspired by the ribbon behind the batteries in some older electronics):
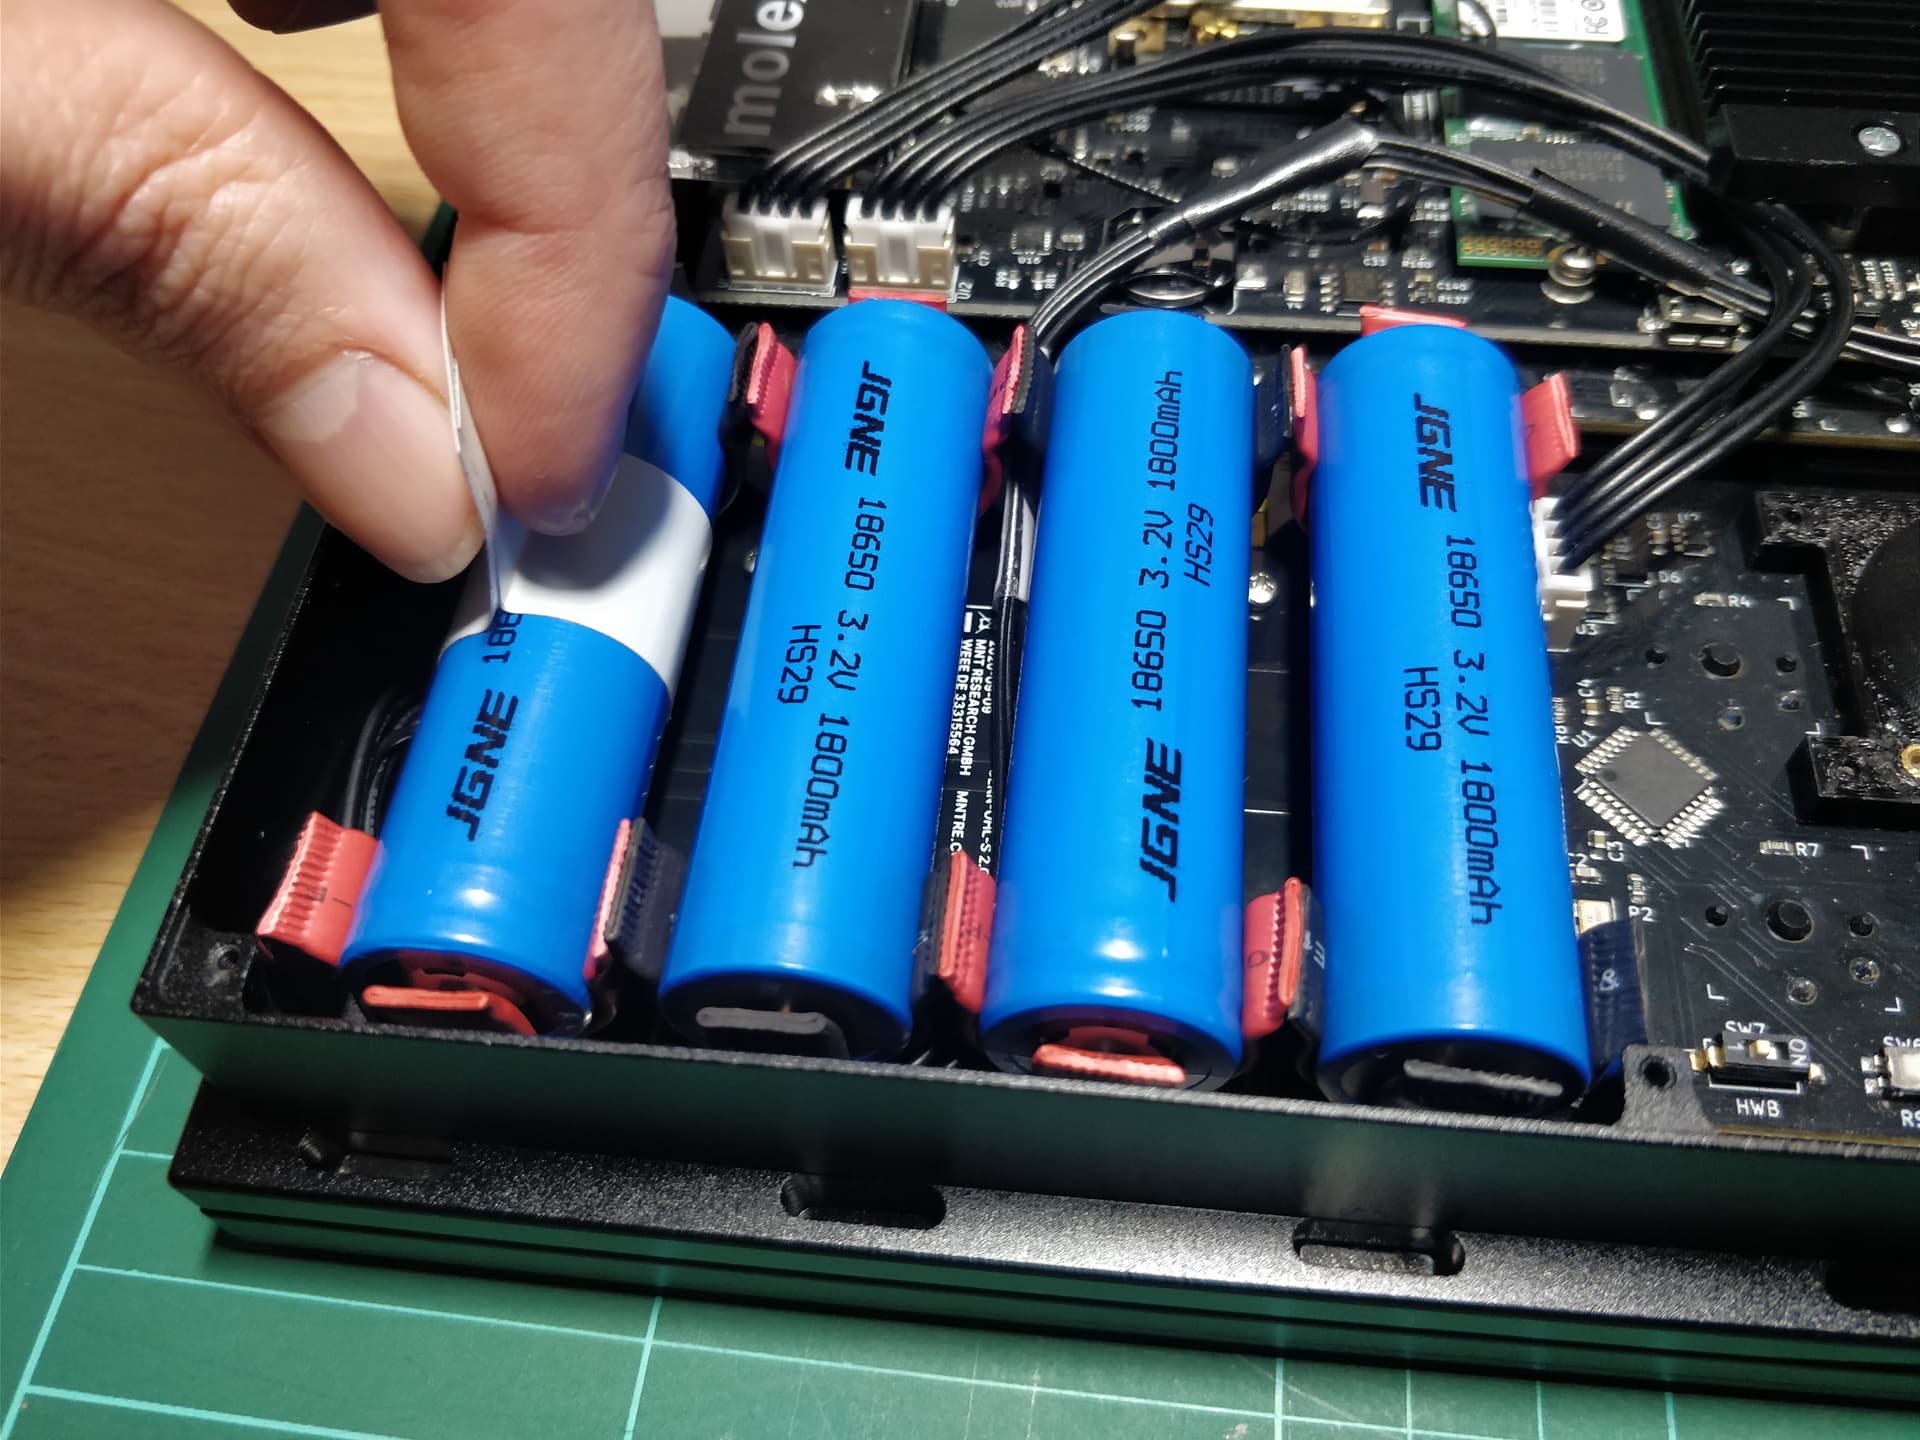
After that first one comes out, there’s enough clearance to get your fingers underneath the next one. I still remove them very carefully though, since I don’t want the extra force to crack the PCB. I might try rubbing a small amount of silicon lubricant on the inside of the clips, to see if that lowers the friction and makes the batteries easier to remove.
Anyhow, I hope this info and idea might be useful to some people.